Introduction to Jellycat Birthday Cake
When it comes to celebrating life’s special moments, nothing beats a deliciously crafted Jellycat birthday cake. This whimsical treat is not only visually stunning but also packed with flavor, making it a centerpiece that will steal the show at any birthday party. Whether you’re hosting a gathering for friends or throwing a fun surprise party for a loved one, a homemade jellycat birthday cake brings a unique charm.
Why a Jellycat Birthday Cake is Perfect for Celebrations
Let’s face it: a birthday isn’t just about the passage of time; it’s an expression of joy, love, and satisfaction. A Jellycat birthday cake captures this essence beautifully. Its vibrant colors and playful design immediately uplift the party atmosphere, enticing guests of all ages. The whimsical nature of this cake also serves as a conversation starter—who wouldn’t be drawn to an adorable cake inspired by beloved toys?
There’s something magical about a cake that embodies the theme of joy and nostalgia, which can be traced back to childhood memories associated with Jellycat toys. Plus, a homemade cake tells your guests that you care enough to put in the effort, making the celebration even more meaningful.
The Joy of Homemade Cakes Versus Store-Bought
While it may be tempting to simply pick up a cake from your local bakery, the feelings evoked by a homemade cake are unbeatable. Crafting a jellycat birthday cake yourself not only allows you to control the ingredients but also lets you customize the flavor profiles to suit the birthday person’s likes and preferences. Imagine creating a fluffy vanilla sponge with a rich buttercream frosting, accentuated by vibrant edible decorations.
Did you know that studies show homemade meals can bring families and friends closer together? Sharing a piece of your labor of love not only fosters connection but also creates lasting memories. So why not roll up your sleeves and dive into the delightful world of cake-making? Not only will you impress your guests, but you’ll also find joy in the process.
If you’re looking for inspiration or tips to get started, feel free to explore resources such as Cake Decorator’s Journal or The New York Times Cooking, where you can find an array of marvelous recipes and decoration ideas.
Crafting a jellycat birthday cake isn’t just about baking—it’s an adventure full of creativity and love!

Ingredients for Jellycat Birthday Cake
Creating a delightful Jellycat Birthday Cake is all about using quality ingredients that blend beautifully to produce a cake everyone will adore. Below, I’ve laid out the essential ingredients you’ll need to whip up this scrumptious treat.
Essential ingredients for the vanilla cake layers
To craft the fluffy vanilla cake layers, you will need:
- All-purpose flour
- Granulated sugar
- Baking powder
- Unsalted butter, softened
- Eggs, room temperature
- Milk, preferably whole for richness
- Vanilla extract, the star flavor in this cake
Each of these components brings a unique texture and flavor that makes every bite simply irresistible. To delve deeper into how each ingredient impacts your cake, check out this resource on baking basics.
Ingredients for the filling and decoration
For the filling and decoration, gather these items for a truly festive look:
- Whipped cream or buttercream frosting
- Fresh strawberries or your choice of berries
- Edible glitter or colorful sprinkles
These additional ingredients not only enhance the flavor but also add a beautiful presentation, ensuring your Jellycat Birthday Cake dazzles at any birthday celebration! What’s your favorite cake decoration?
Preparing Jellycat Birthday Cake
Baking a Jellycat Birthday Cake is an adventure filled with sweetness and joy. This delightful cake, inspired by the charming Jellycat toys, is sure to be a hit at any celebration. Here’s how to prepare this enchanting treat step by step!
Preheat the Oven and Prepare Your Cake Pans
Before diving into mixing ingredients, it’s essential to prepare your baking space. Preheat your oven to 350°F (175°C). This ensures that your cake layers bake evenly and rise perfectly. While the oven warms up, take the time to grease and flour your cake pans. If you have parchment paper, placing it on the bottom of the pans helps the cakes release easily once baked. You’ll need two 9-inch round pans for this recipe. Remember, the key to a successful cake is all in the preparation!
Mix the Dry Ingredients
Now that we’ve got the oven heating, let’s mix the dry ingredients. In a large mixing bowl, combine:
- 2 cups of all-purpose flour
- 1 ½ cups of granulated sugar
- ½ cup of unsweetened cocoa powder
- 1 ½ teaspoons of baking powder
- 1 ½ teaspoons of baking soda
- 1 teaspoon of salt
Whisk these ingredients together until they are well combined. This not only blends the flavors but also helps aerate the flour, making your cake light and fluffy. While you’re at it, you might want to check out The Kitchn’s guide on baking basics for tips on mixing and measuring ingredients.
Combine Wet Ingredients and Create the Batter
In another bowl, it’s time for the wet ingredients. You’ll need:
- 1 cup of whole milk
- ½ cup of vegetable oil
- 2 large eggs
- 2 teaspoons of vanilla extract
Whisk these together until the mixture is smooth and creamy. Gradually add the wet mixture to your dry ingredients, mixing until everything is just incorporated. Be careful not to overmix—this can lead to a dense cake. At this point, the batter will have a rich chocolate aroma that’s hard to resist!
Bake the Cake Layers
Pour your batter evenly into the prepared pans. Bake them in the preheated oven for 30 to 35 minutes, or until a toothpick inserted into the center comes out clean. The anticipation of that sweet aroma filling your kitchen is almost as delightful as the cake itself! Once they’re done, let them cool in the pans for about 10 minutes before transferring them to a wire rack to cool completely.
Make the Filling and Prepare the Whipped Cream
While the cakes are cooling, let’s whip up some delicious filling! You can use a simple mixture of:
- 1 cup of your favorite jam (raspberry works beautifully)
For the whipped cream, chill your mixing bowl and whisk in advance. Then combine:
- 2 cups of heavy cream
- ¼ cup of powdered sugar
- 1 teaspoon of vanilla extract
Whip until you achieve soft peaks. This velvety whipped cream is a perfect accompaniment and adds a fantastic lightness to your jellycat birthday cake.
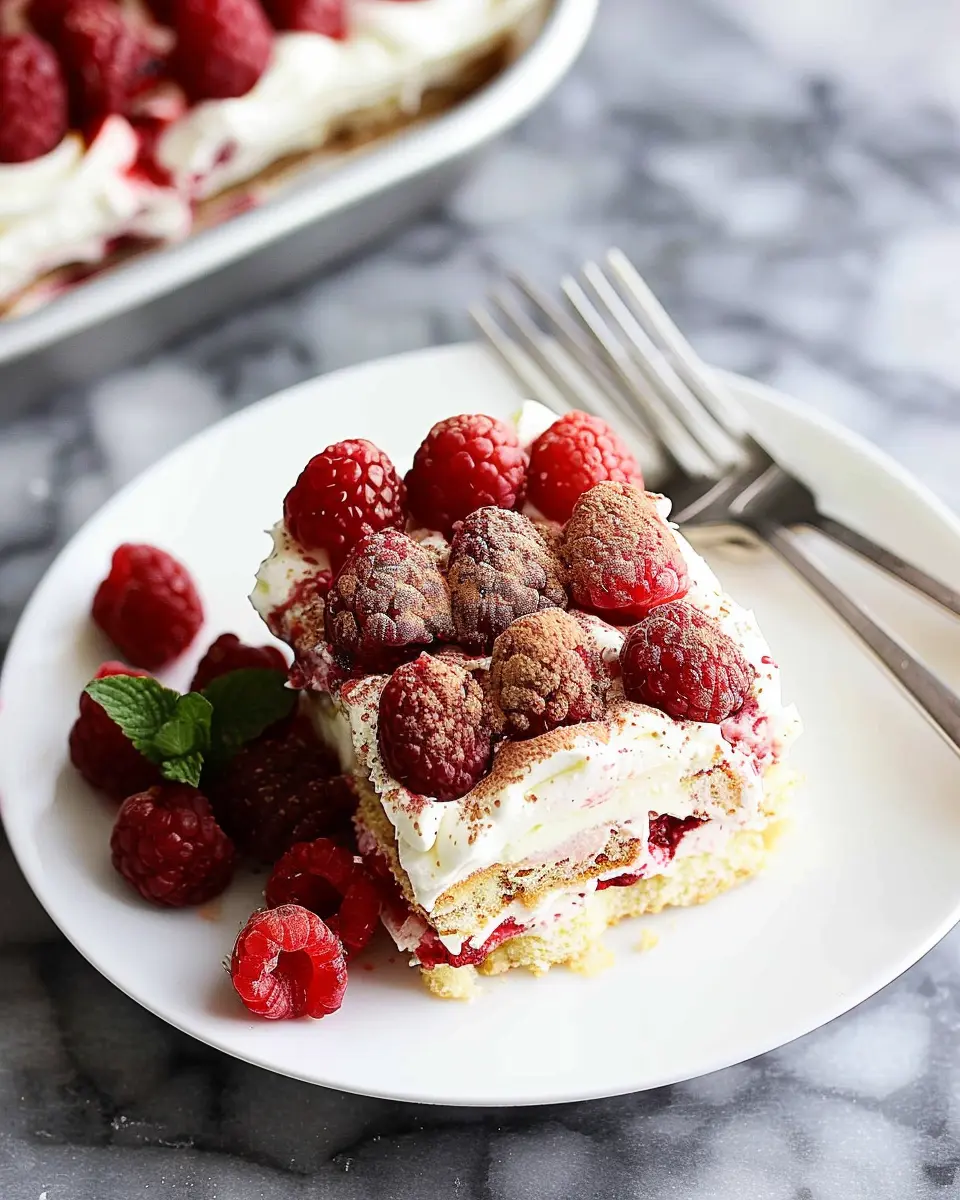
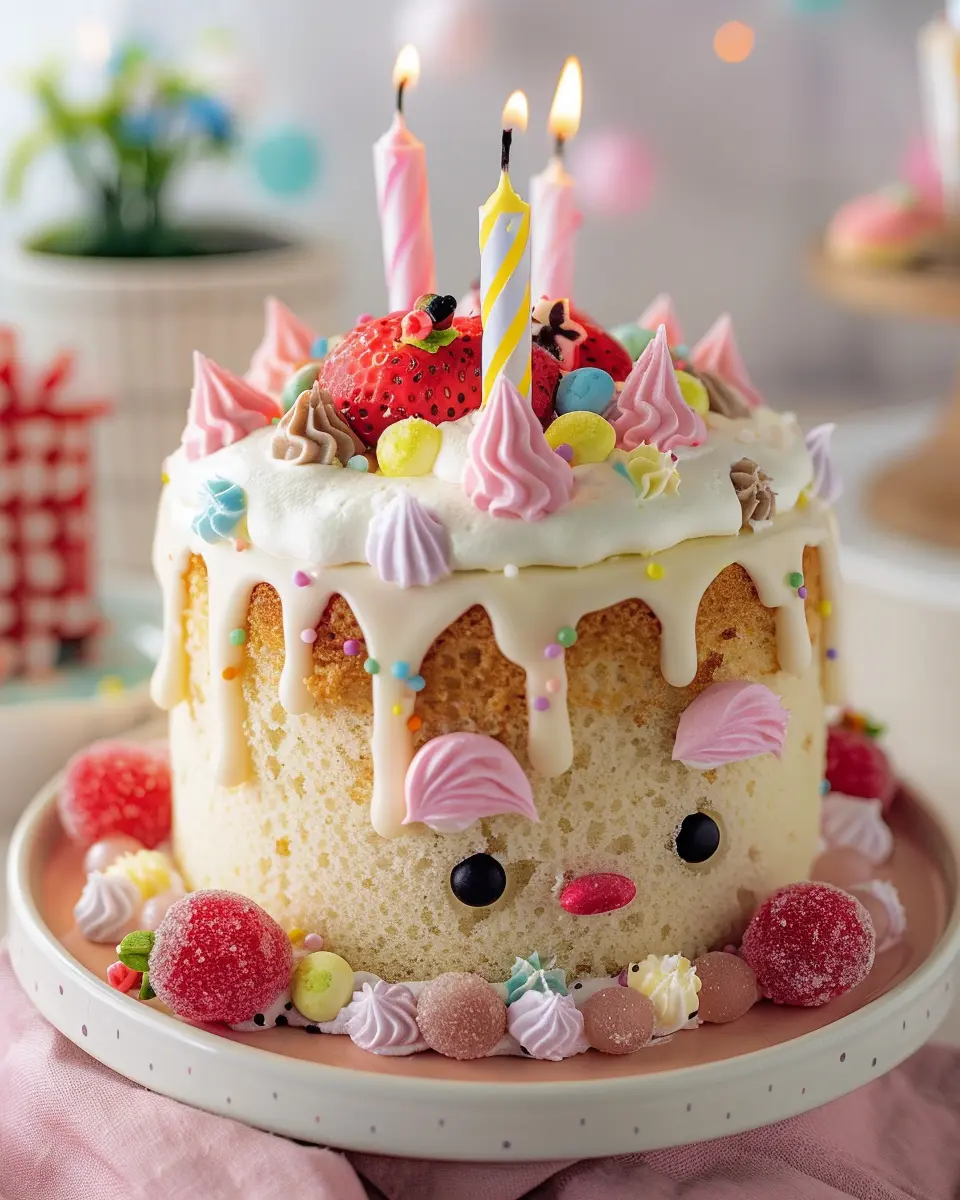
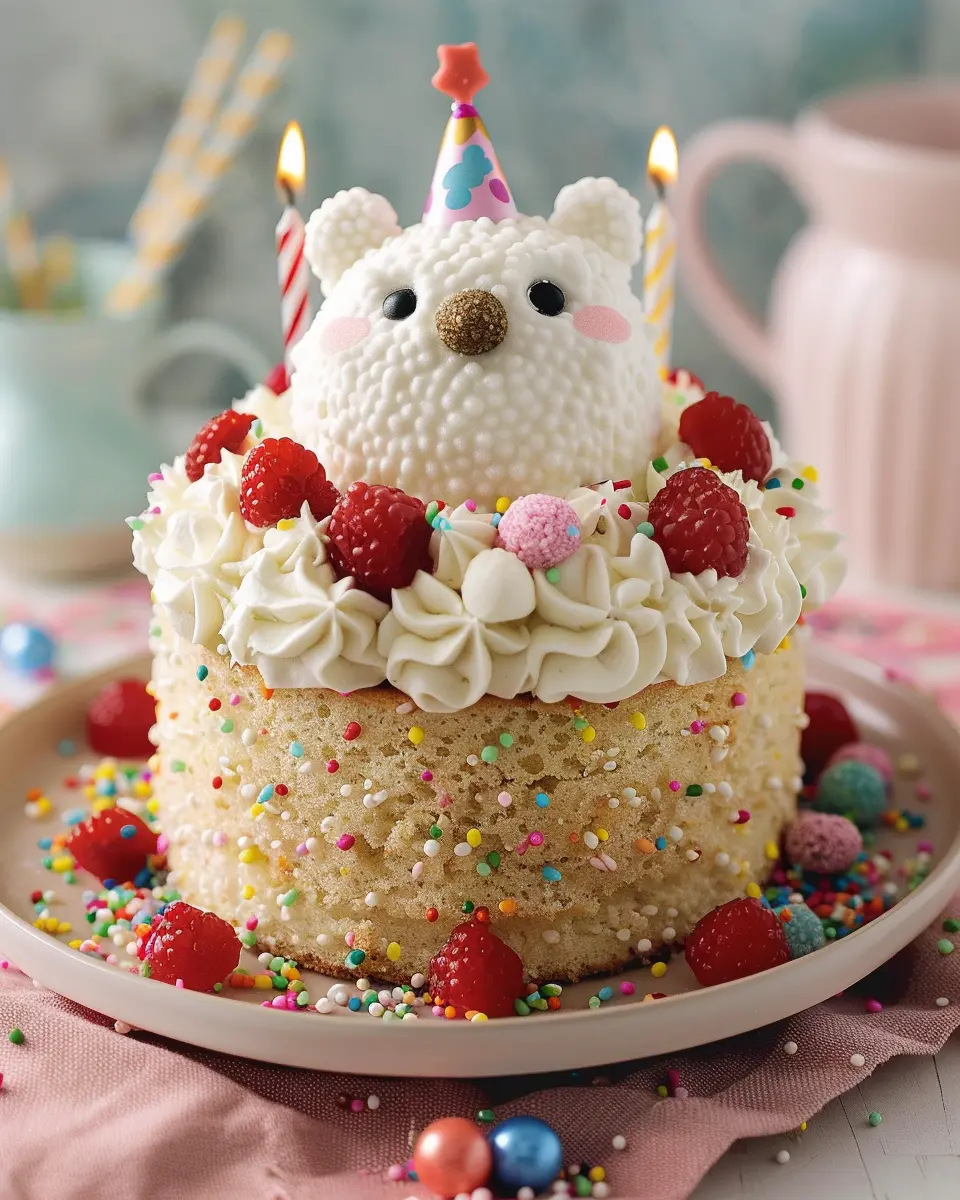
Assemble the Cake and Add Decorations
It’s time for the fun part—assembly! Place one cake layer on a serving platter. Spread a generous layer of your chosen jam on top, followed by a layer of whipped cream. Carefully place the second cake layer on top and frost the entire cake with the remaining whipped cream.
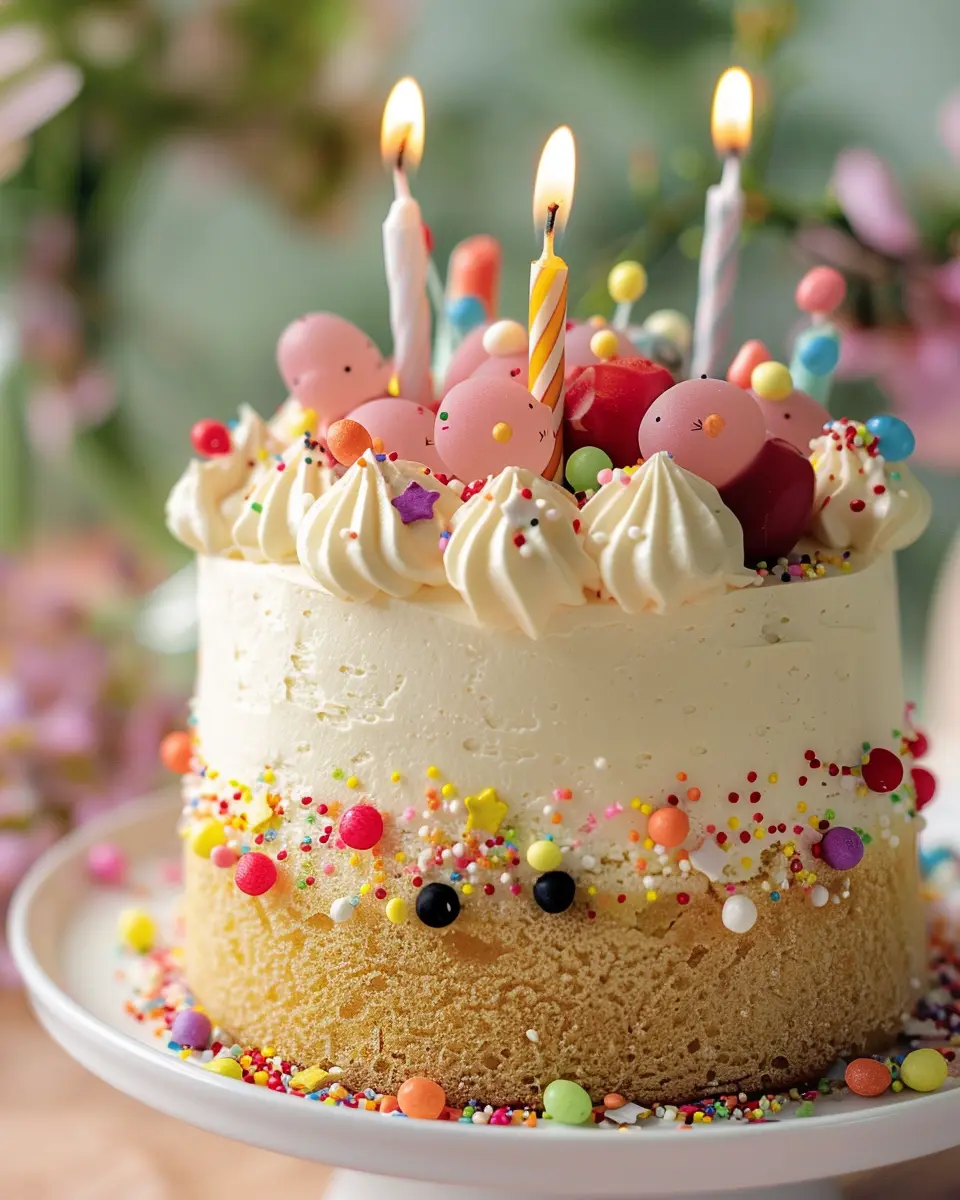
For those finishing touches, get creative with decorations! Fresh berries, edible flowers, or sprinkles can add an extra pop to your cake. Don’t forget the Jellycat toy sitting atop the cake for that whimsical touch!
Creating your very own Jellycat Birthday Cake is not just about baking; it’s about bringing joy into celebration. Enjoy the cheerful vibes and indulge in every slice!
Variations on Jellycat Birthday Cake
When it comes to customizing your Jellycat Birthday Cake, the possibilities are endless. Whether you’re a fan of rich flavors or prefer something light and fruity, these variations have got you covered!
Chocolate Jellycat Cake
If chocolate is your love language, why not turn your Jellycat Birthday Cake into a decadent chocolate delight? Simply substitute half of the flour with cocoa powder to create a rich, chocolaty base. You can even add chocolate chips to the batter for extra indulgence. Top it off with a luscious chocolate ganache or a creamy frosting for an extra layer of richness. Pairing it with fresh strawberries or raspberries can add a delightful contrast in flavor. Don’t forget to check out this chocolate frosting recipe that holds up beautifully for decorating.
Fruit-loaded Jellycat Cake
For those looking to incorporate a burst of freshness, consider a fruit-loaded Jellycat Birthday Cake. Replace some of the flour with finely chopped fruits like strawberries, blueberries, or even diced peaches. The sweetness of the fruit balances perfectly with the rich cake base. Feel adventurous? Make a fruit glaze with a simple syrup and your choice of pureed fruit to pour over the cake. Read more about fruity cake variations at this baking resource.
Gluten-free or Vegan Jellycat Variations
Catering to dietary restrictions? Creating a gluten-free or vegan Jellycat Birthday Cake is easier than you might think! For a gluten-free version, opt for almond or coconut flour instead of regular flour. For a vegan option, use flaxseed meal for egg replacement and plant-based milk instead of dairy. These alternatives can yield a moist and flavorful cake that everyone can enjoy without compromise. You can find excellent tips for baking gluten-free and vegan cakes on specialty blogs.
With these variations, your Jellycat Birthday Cake will not only be a showstopper but also a delightful treat tailored to everyone’s taste. Enjoy baking!
Baking Notes for Jellycat Birthday Cake
Tips for Perfecting Your Cake Texture
Achieving the ideal texture for your Jellycat Birthday Cake is all about balance. Use room temperature ingredients—especially eggs and butter—so they blend smoothly, creating a light and airy batter. Remember to measure flour correctly; consider using the spoon-and-level method for accuracy. Over-mixing can lead to a dense cake, so mix just until combined.
How to Ensure Even Baking
For a uniformly baked Jellycat Birthday Cake, try these strategies:
- Use the same-sized pans: This ensures every layer bakes at the same rate.
- Rotate your pans halfway through: This helps counteract any hot spots in your oven.
- Check with a toothpick: Insert it in the center, and if it comes out clean, your cake is done!
Common Pitfalls to Avoid
Steer clear of these common mistakes to make your baking experience smooth and enjoyable:
- Opening the oven door too early: This can cause your cake to sink in the middle.
- Not prepping your pans properly: Grease and flour them well to prevent sticking.
- Ignoring baking times: Every oven is different; use a timer as a guide but rely on visual cues and toothpick tests.
By keeping these notes in mind, you’ll be well on your way to creating a delightful Jellycat Birthday Cake that’s sure to impress! For more baking tips, check out resources like The Kitchn for expert advice.
Serving suggestions for Jellycat Birthday Cake
Pairing dessert with beverages
When it comes to celebrating with your Jellycat Birthday Cake, the beverages you choose can make a delightful difference. Think of options that will complement the cake’s sweet, fluffy flavors.
- Milkshakes: A classic pairing! Blend up a creamy vanilla or chocolate milkshake. This will not only be a hit with the kids but also invoke a sense of nostalgia for adults.
- Sparkling Water: For a sophisticated twist, try serving the cake with flavored sparkling water. Options like raspberry or lemon can enhance the sweetness without being too heavy.
- Herbal Iced Tea: Cool and refreshing, a lightly sweetened herbal iced tea, such as hibiscus or peach, pairs beautifully, providing a fragrant contrast.
Creative serving ideas for parties
To elevate your Jellycat Birthday Cake display, consider these fun and interactive serving ideas:
- Build-a-Cake Bar: Set up a station with various toppings, such as sprinkles, whipped cream, or fresh fruit. Guests can customize their slices, making the experience more engaging.
- Mini Cakes: Instead of one large cake, make mini Jellycat cakes. These are not only adorable but also allow for easy serving and portion control.
- Cake Pops: Transform leftover cake into fun cake pops. Just crumble the cake, mix it with frosting, form balls, and dip them in chocolate. They’re perfect for mingling guests!
By combining thoughtful beverage pairings and creative presentation ideas, your Jellycat Birthday Cake will be a memorable highlight at any celebration. For more inspiration, head over to Food Network or check out Epicurious for similar cake ideas.
Time details for Jellycat Birthday Cake
Preparation time
Making your Jellycat Birthday Cake starts with getting everything ready. You’ll need approximately 30 minutes for prepping the ingredients and the baking pans. Gather your flour, sugar, and all those delightful toppings. It’s the perfect time to get excited about the deliciousness to come!
Baking time
Once your batter is mixed and in the pans, pop them into the oven for about 25-30 minutes. It’s the moment when your kitchen will start to smell heavenly—who wouldn’t want that? Be sure to check for a golden brown top and use a toothpick to ensure they’re baked to perfection.
Cooling and assembly time
After baking, let your cakes cool for at least 20 minutes before assembling. This is crucial to avoid any melty mishaps with your frosting. Once cooled, layer them up with your favorite frosting and toppings—this is where the fun really begins. For an engaging frosting guide, visit this expert pastry site.
Remember, patience is key! Your beautifully crafted Jellycat Birthday Cake will be worth every minute spent. Enjoy the process!
Nutritional information for Jellycat Birthday Cake
Calories and serving size
When diving into the delightful world of the Jellycat Birthday Cake, it’s essential to keep track of your indulgence. A standard serving size is typically around 100 grams, providing roughly 350 calories. This sweet treat is perfect for sharing, but if you’re like many, you might find it hard to resist another slice!
Key nutrients to consider
It’s not just about the calories; the Jellycat Birthday Cake also brings along some nutritious benefits. Here are key nutrients to consider:
- Carbohydrates: About 50 grams per serving, gives you that burst of energy needed for celebrations.
- Fats: Generally around 15 grams, including healthy fats from any oils used.
- Protein: A modest 4 grams, great for muscle repair and growth.
Incorporating healthier ingredients can enhance these nutritional values—check out additional tips on healthful baking here. Remember to enjoy this cake as part of a balanced diet!
FAQs about Jellycat Birthday Cake
What if I don’t have all the ingredients?
Not having every ingredient for your Jellycat birthday cake doesn’t mean you’re out of luck! Baking is often flexible, so feel free to get creative. If you’re missing something, consider substituting with similar items. For instance, if you don’t have baking powder, a mix of baking soda and cream of tartar can work wonders. Likewise, if you can’t find certain decorations for the cake that mimic the Jellycat plushie, use what you have on hand—candy or sprinkles can also make your cake pop!
How can I make the cake look more like the Jellycat plushie?
To give your Jellycat birthday cake that adorable plushie vibe, focus on the details! Use pastel-hued frosting to mimic the softness of the toys, and don’t skimp on the sprinkles—they can add that playful touch. Consider making fondant shapes that resemble Jellycat’s signature elements, like ears or whiskers. If you want to delve deeper into cake decorating techniques, resources like Wilton offer fantastic tips and tutorials for beginners and pros alike.
Can leftovers be stored, and how?
Absolutely! If you’ve got any Jellycat birthday cake left after the party, store it properly to keep it fresh. Wrap the cake tightly in plastic wrap and place it in an airtight container. This keeps it moist and delicious for about three days at room temperature. For longer storage, consider freezing individual slices. Just make sure they’re well-wrapped to prevent freezer burn. When you’re ready to enjoy a slice, let it thaw in the refrigerator overnight.
Embrace these cake adventures, and happy baking!
Conclusion on Jellycat Birthday Cake
Recap of the Joy of Baking and Sharing
Baking is more than just a culinary task; it’s a heartfelt way to connect with friends and family. The Jellycat Birthday Cake embodies this spirit, turning an ordinary celebration into a memorable occasion. As you layer the sponge and whip the frosting, you’ll find joy in each sprinkle and decoration you add. Plus, sharing this delightful cake brings smiles that are just as sweet as the dessert itself.
Encouragement to Try Making the Cake at Home
So why not give this whimsical cake a go in your own kitchen? With its playful design and delicious flavors, the Jellycat Birthday Cake is perfect for any celebration. You don’t need to be a professional baker—just a little enthusiasm and love for creative cooking! Who knows? This could become a new favorite in your baking repertoire. Check out the full recipe here and start mixing, baking, and sharing the love!
Print
Jellycat Birthday Cake: The Best Homemade Recipe for Celebration
Celebrate your special day with this delightful Jellycat Birthday Cake. Perfectly soft, sweet, and decorated to bring joy to any party!
- Total Time: 50 minutes
- Yield: 12 servings 1x
Ingredients
- 2 cups all-purpose flour
- 1 cup sugar
- 1 cup unsalted butter, softened
- 4 large eggs
- 1 cup milk
- 2 teaspoons vanilla extract
Instructions
- Preheat your oven to 350°F (175°C).
- In a large bowl, cream together the butter and sugar until light and fluffy.
- Add the eggs one at a time, beating well after each addition.
- Stir in the vanilla extract.
- Gradually add the flour and milk, alternating between the two, and mix until just combined.
- Pour the batter into a greased cake pan and spread evenly.
- Bake for 30-35 minutes, or until a toothpick inserted in the center comes out clean.
- Allow to cool completely before decorating.
Notes
- For a fun twist, add colorful sprinkles to the batter.
- This cake pairs well with cream cheese frosting.
- Prep Time: 15 minutes
- Cook Time: 35 minutes
- Category: Dessert
- Method: Baking
- Cuisine: American
- Diet: Vegetarian
Nutrition
- Serving Size: 1 slice
- Calories: 350
- Sugar: 15g
- Sodium: 150mg
- Fat: 20g
- Saturated Fat: 12g
- Unsaturated Fat: 8g
- Trans Fat: 0g
- Carbohydrates: 45g
- Fiber: 1g
- Protein: 4g
- Cholesterol: 80mg
Keywords: Jellycat Birthday Cake, homemade birthday cake, celebration cake