
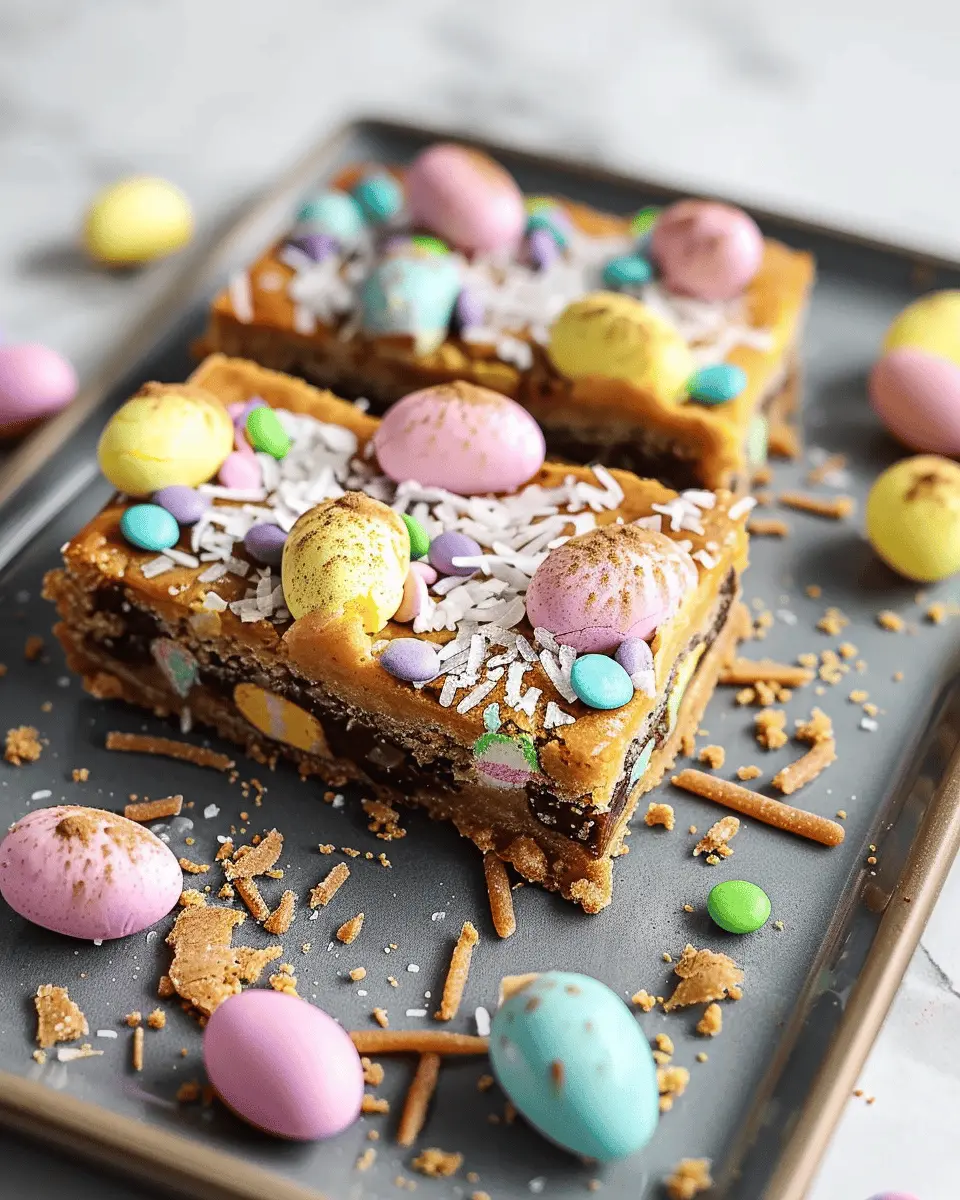
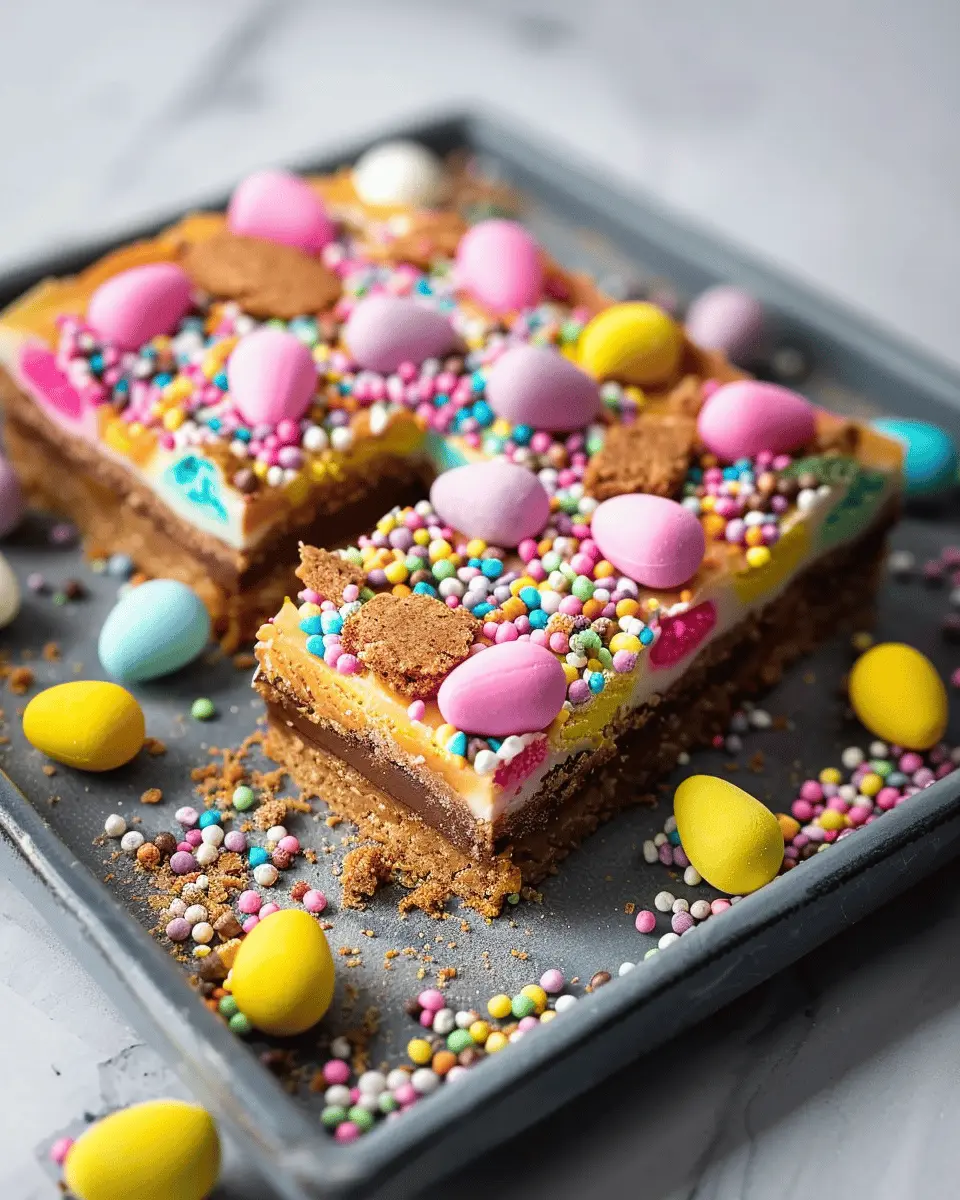
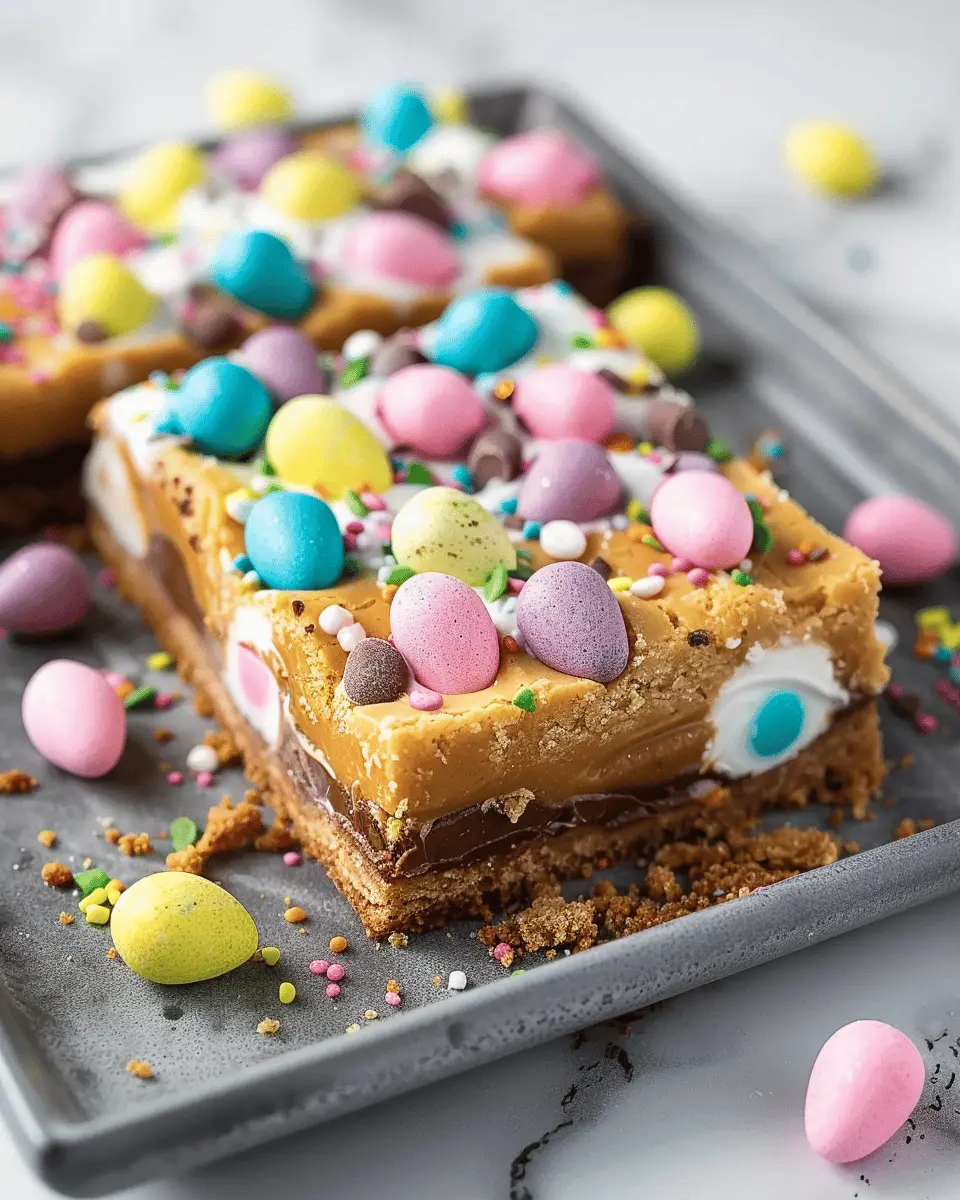
Introduction to Easter Egg Cookie Bars
As spring approaches, the excitement for holiday baking begins to bubble over like a freshly stirred pot of cookie dough. One delightful treat that perfectly captures the essence of the season is Easter Egg Cookie Bars. With their vibrant colors and cheerful flavor, these bars aren’t just a dessert; they’re a celebration of spring itself.
Why Easter Egg Cookie Bars are the perfect spring treat
Imagine cracking open a colorful chocolate egg and discovering a chewy, delicious cookie bar inside! That’s the joy of Easter Egg Cookie Bars. They are easy to make, quick to bake, and can be whipped up in no time—ideal for busy young professionals with packed schedules.
These cookie bars serve as a delightful centerpiece for your spring gatherings. According to a study from the National Confectioners Association, around 80% of Americans enjoy chocolate during the Easter season (a little chocolate never hurts!). Incorporating chocolate treats into your celebrations can create cherished memories around the family table.
-
Vibrant Colors: The brilliant hues of mini Easter eggs scattered throughout the bars add a playful touch. They not only look inviting but also correspond perfectly with the blossoming flowers and fresh landscape of spring.
-
Texture and Flavor: The combination of soft, buttery cookie bars with the crunch of chocolate eggs creates a delightful contrast. Every bite gives you a satisfying mix of chewy, crunchy, and sweet—not to mention, who doesn’t love the taste of chocolate?
-
Sharing: These bars are great for sharing! Whether it’s for a potluck with friends or a cozy family gathering, everyone loves something sweet to munch on. Why not surprise your colleagues with a batch during a coffee break? You might just become the office hero!
If you’re looking for a fun, festive treat to usher in the spring vibes, you’ll adore making these Easter Egg Cookie Bars. They embody everything that is joyful and bright about the season. Ready to get baking? Let’s dive into the recipe and create something unforgettable!
Ingredients for Easter Egg Cookie Bars
Creating delightful Easter Egg Cookie Bars is an ideal way to celebrate the season and indulge in some deliciousness with friends and family. To craft these bars, you’ll need a few simple yet essential ingredients that bring rich flavors and festive colors to your treat.
Key Ingredients
- Butter: 1 cup, softened
- Brown Sugar: 1 cup, packed for a rich sweetness
- Granulated Sugar: ½ cup, balancing the flavors
- Eggs: 2 large, to bind everything together
- Vanilla Extract: 2 teaspoons, for that lovely aroma
- All-Purpose Flour: 2 cups, forming the base of your bars
- Baking Soda: 1 teaspoon, to help them rise
- Salt: ½ teaspoon to enhance flavor
- Mini Chocolate Eggs: 1 cup, for a festive twist and color
- Easter Sprinkles: Optional, for extra fun!
Gather these ingredients, and you’re almost there! Check out this guide for tips on ingredient substitutions and variations to make your Easter Egg Cookie Bars even more unique. It’s a great opportunity to add your touch! Whether you’re hosting an Easter gathering or simply enjoying a cozy night in, these bars will surely impress.
Preparing Easter Egg Cookie Bars
Easter is a wonderful time for gathering the family and embracing traditions. One of the best ways to celebrate is by making delightful Easter Egg Cookie Bars. If you’re ready to dive into a playful recipe that’s as fun to create as it is to enjoy, let’s get started!
Gather all your ingredients
Before getting your hands doughy, it’s essential to have everything you need at your fingertips. This not only makes the process smoother but also more enjoyable. Here’s what you’ll need:
- 2 ½ cups all-purpose flour
- 1 tsp baking soda
- 1 tsp salt
- 1 cup unsalted butter, softened
- 1 cup brown sugar, packed
- ½ cup granulated sugar
- 2 large eggs
- 2 tsp vanilla extract
- 1 ½ cups Easter candy (think mini chocolate eggs or colorful candies)
With these ingredients ready to go, you’ve set the stage for some delicious cookie bars that will have everyone asking for seconds!
Mix the wet ingredients
Now that you have all your ingredients in place, let’s start by mixing the wet components. In a large mixing bowl, combine the softened unsalted butter, brown sugar, and granulated sugar. Beat them together until the mixture is fluffy and light – around 2 to 3 minutes should do the trick.
Next, add the eggs, one at a time, mixing well after each addition. Following this, stir in the vanilla extract. This step is where the magic begins; the scent of vanilla will fill your kitchen, and you might find yourself humming a cheerful tune!
Combine the dry ingredients
While your wet ingredients are coming together beautifully, it’s time to tackle the dry ingredients. In another bowl, whisk together the flour, baking soda, and salt. It’s crucial to mix these well to ensure that everything is evenly distributed.
Using a whisk helps avoid clumps, and it’s a good idea to pass them through a sifter if you want an extra fluffy end result. If you’re curious about why sifting matters, you can explore more at The Kitchn.
Create the dough
Now that both your wet and dry ingredients are ready, it’s time to combine them. Gradually add the dry mixture into the wet ingredients, mixing at a low speed. You want to ensure that everything comes together without over-mixing, or your dough may become tough.
The result should be a smooth, creamy dough that’s just the right consistency. You can also take a moment to sneak a little taste and feel the excitement building!
Fold in the candies
This is where the fun really begins! Gently fold in your colorful Easter candies until they are evenly distributed throughout the dough. This step is like adding a burst of joy; each bite will be filled with surprises!
If you’re using mini chocolate eggs, consider smashing up a few for that extra delight. Who doesn’t love a chewy bite paired with a crunchy texture?
Bake to perfection
Finally, let’s get those Easter Egg Cookie Bars into the oven! Preheat your oven to 350°F (175°C) and prepare a baking dish by lining it with parchment paper or greasing it thoroughly. Spread the dough evenly in the pan, making sure it’s smooth on top.
Pop this delicious creation into the oven and bake for about 20-25 minutes, or until the edges are golden brown, and the center is set. Make sure to check your bars around the 20-minute mark, as ovens can vary.
Once they’re out of the oven, allow them to cool completely in the pan before slicing. This step is crucial; patience here will lead to the perfect texture! For more inspiration and tips on spring baking, head to BBC Good Food.
There you have it – your Easter Egg Cookie Bars journey is complete! Enjoy these with your loved ones; they’re a heartfelt addition to any Easter celebration.
Variations on Easter Egg Cookie Bars
When it comes to Easter Egg Cookie Bars, creativity knows no bounds! If you’re looking to mix things up or cater to special diets, here are a couple of ideas to inspire your baking.
Using Different Types of Candy
While classic chocolate eggs are a go-to, why not play around with various candies? Consider incorporating:
- Mini chocolate candies: Think M&M’s or Reese’s Pieces for that extra crunch.
- Fruit-flavored candies: Jellybeans or Sour Patch Kids can add a fresh twist.
- Nutty options: Chopped nuts or toffee bits help enhance the texture and flavor.
Combine a couple of options to discover new flavor combinations. Imagine chewy-tart jellybeans contrasting with rich chocolate in every bite!
Making Them Gluten-Free
Want to enjoy Easter Egg Cookie Bars while keeping them gluten-free? It’s simpler than you think! Here’s how:
- Substitute all-purpose flour: Use a gluten-free flour blend instead. Many brands are designed to closely mimic the properties of wheat flour.
- Create a binder: Coconut flour or almond flour can add a delightful nutty taste, but remember to adjust the moisture content in your recipe since these can absorb more liquid.
With these adjustments, your cookie bars become a delightful treat for everyone at your Easter gathering. Plus, there are fantastic gluten-free resources available online, like the Gluten Free Society to help guide your baking journey.
Whatever variation you choose, these Easter Egg Cookie Bars will surely become a festive favorite everyone can enjoy!
Baking notes for Easter Egg Cookie Bars
Tips for even baking
To achieve perfectly baked Easter Egg Cookie Bars, ensure your oven temperature is accurate. Use an oven thermometer to check if it runs hot or cold. For even baking, it’s best to rotate your baking sheet halfway through the baking time. This simple step can make a big difference in how uniformly your cookie bars turn out! Also, consider using parchment paper for easy removal and to prevent sticking.
Storing your cookie bars
Once your Easter Egg Cookie Bars have cooled, store them in an airtight container at room temperature. They should last up to a week—if they last that long! For longer storage, you can freeze individual bars wrapped in plastic wrap and then placed in a zip-top bag for up to three months. Just thaw them at room temperature when you’re ready to enjoy another sweet treat!
For tips on maintaining baked goods, check out this guideline on storage methods.
Serving Suggestions for Easter Egg Cookie Bars
Pairing with Hot Beverages
When enjoying your Easter Egg Cookie Bars, consider pairing them with a cozy hot beverage for a delightful treat. A rich cup of hot chocolate complements the sweet, chocolatey flavor of the bars perfectly. If you prefer coffee, try a creamy latte or even a spiced chai tea—they both provide the warmth and comfort that make your dessert experience even more special. Don’t forget that homemade whipped cream or a sprinkle of cinnamon can elevate these drinks, adding an extra layer of indulgence.
Creative Presentation Ideas
Presentation can make your Easter Egg Cookie Bars feel extra festive! Here are some ideas to inspire you:
- Serve on a pastel platter: A colorful dish can enhance the springtime vibe.
- Garnish with edible flowers: These add a beautiful touch, making your bars feel even more special.
- Cut into different shapes: Use cookie cutters for fun shapes, perfect for Easter gatherings.
For more decorating tips, check out resources from Good Housekeeping that delve into creative presentation techniques. By giving your desserts a little extra thought, you can create visually stunning treats that wow your friends and family this Easter!
Tips for Making Perfect Easter Egg Cookie Bars
Crafting delightful Easter Egg Cookie Bars can seem intimidating, but with these handy tips, you’ll become a baking pro in no time!
Choose the Right Eggs
When selecting your Easter eggs, opt for chocolate varieties that won’t melt too easily in the dough. Brands that offer sturdy shells, like Cadbury or Reese’s, are perfect for adding that decadent touch. This not only boosts flavor but adds visual appeal too!
Don’t Overmix the Batter
One key to achieving the perfect cookie bar texture is to mix the dough just until the ingredients are combined. Overmixing can lead to tough cookie bars, which is just not what we want for a festive treat. Remember, a little bit of flour streaks is okay!
Let Them Cool
After baking, allow your Easter Egg Cookie Bars to rest in the pan for at least 10-15 minutes before cutting them into squares. This helps them set properly and ensures they don’t crumble when you slice into them. Trust me; patience pays off here!
Add Colorful Touches
To elevate your Easter Egg Cookie Bars, consider drizzling melted white or dark chocolate over the top. Not only does it look stunning, but it also adds an extra layer of flavor. Want to explore more creative ideas? Check out Love and Olive Oil for inspiration.
By following these tips, your Easter Egg Cookie Bars will be a hit at any spring gathering. Happy baking!
Time details for Easter Egg Cookie Bars
Preparation time
Getting started on your Easter Egg Cookie Bars is a breeze! You’ll need about 15 minutes to gather your ingredients and mix everything together. This is a great opportunity to put on your favorite playlist or podcast while you measure out those goodies!
Baking time
Once you’ve got your mixture ready, pop it in the oven to bake for 25 to 30 minutes. Keep an eye on them as they cook, and you’ll know they’re ready when the edges are golden brown.
Total time
Overall, you’re looking at about 40 to 45 minutes from start to finish. In no time, you’ll have these delightful treats ready to impress at your Easter gathering. Happy baking!
For more tips on mastering baking techniques, check out Baking Basics and elevate your cookie game!
Nutritional Information for Easter Egg Cookie Bars
When it comes to satisfying your sweet tooth during the holiday season, Easter Egg Cookie Bars are a delightful treat! Here’s a quick run-down of their nutritional highlights:
Calories
Each bar typically contains around 200 calories, making them a fun treat that won’t completely derail your daily calorie goals. If you’re counting calories, consider enjoying a smaller piece to indulge without overdoing it.
Sugar Content
With about 12 grams of sugar per bar, these cookie bars are sweet enough to please but still manageable in moderation. Remember, sugar is an essential energy source, but try to balance it with nutritious foods throughout your day.
For more insights on sugar consumption and healthy alternatives, check out the Harvard School of Public Health.
Indulging in Easter Egg Cookie Bars will elevate your festive spirit without sacrificing your health goals! Enjoy responsibly!
FAQs about Easter Egg Cookie Bars
Can I substitute the candy?
Absolutely! Easter Egg Cookie Bars encourage creativity. If you don’t have candy-coated chocolate eggs, consider using crushed up chocolate bars, dried fruits, or even colorful sprinkles for a festive twist. Try swapping in your favorite candies like peanut butter cups or caramel-filled treats. Just keep in mind that the size of the candy might affect the texture, so aim for similar-sized swaps.
How do I know when they’re done?
This is crucial for the perfect texture. Look for golden edges and a slightly soft center in your Easter Egg Cookie Bars. Generally, the bars should bake for about 25-30 minutes. If you gently press the middle and it springs back, they’re ready! Remember, they will continue cooking a bit as they cool down, so don’t be tempted to leave them in for an extra five minutes.
What’s the best way to store leftovers?
Leftover Easter Egg Cookie Bars can be a delightful treat for days! Store them in an airtight container at room temperature for up to a week. If you want to keep them longer, consider freezing them. Wrap individual bars in plastic wrap and then place them in a freezer-safe bag. They’ll stay fresh for up to three months. To enjoy, thaw them in the fridge overnight or let them sit out for a bit at room temperature before serving.
If these bar cookies sound too tempting to resist, try your hand at making them for your next gathering. For more tips and variations, check out this article on simple baking substitutes to expand on your baking skills!
Conclusion on Easter Egg Cookie Bars
As we wrap up our exploration of Easter Egg Cookie Bars, it’s clear these delightful treats are more than just a seasonal snack. Not only do they bring a pop of color and fun to your dessert table, but they also offer a delicious way to use up extra Easter candy, making them a hit with friends and family alike.
Imagine serving these chewy bars at your next gathering—everyone will be asking for seconds! If you’re in the mood to experiment, think about varying the mix-ins or adjusting the sweetness to suit your preferences. Don’t forget to share your creations on social media; who doesn’t love showing off their baking skills? Happy baking!
Print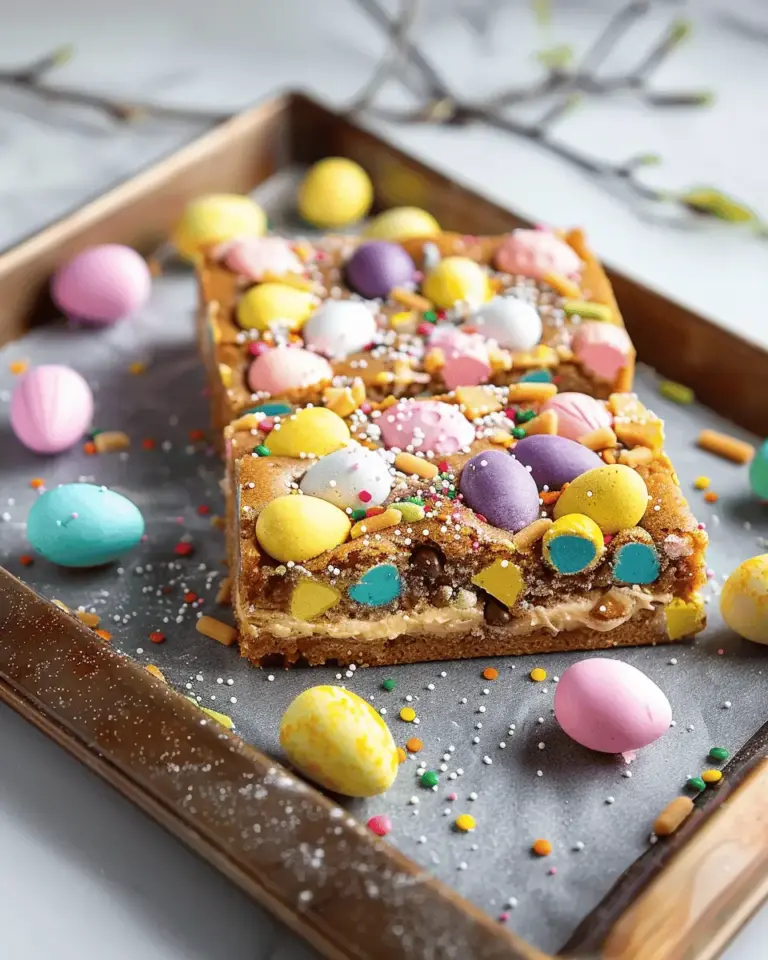
Easter Egg Cookie Bars: Indulgent Treat for Your Holiday Table
These Easter Egg Cookie Bars are a delightful treat perfect for your holiday celebrations. Indulge in the sweet and festive flavors that make this dessert a family favorite.
- Total Time: 45 minutes
- Yield: 24 bars 1x
Ingredients
- 1 cup unsalted butter, softened
- 1 cup brown sugar, packed
- 1 cup granulated sugar
- 2 large eggs
- 2 teaspoons vanilla extract
- 3 cups all-purpose flour
- 1 teaspoon baking soda
- 1/2 teaspoon salt
- 1 cup chocolate chips
- 1 cup chopped Easter candy
Instructions
- Preheat the oven to 350°F (175°C) and grease a 9×13-inch baking pan.
- In a large bowl, cream together the butter, brown sugar, and granulated sugar until smooth.
- Add the eggs and vanilla, mixing well.
- In another bowl, whisk together the flour, baking soda, and salt.
- Gradually add the dry ingredients to the wet ingredients, stirring until fully combined.
- Fold in the chocolate chips and chopped Easter candy.
- Spread the batter evenly in the prepared baking pan.
- Bake for 25-30 minutes or until golden brown.
- Allow to cool before slicing into bars.
Notes
- For extra flavor, consider adding a pinch of cinnamon to the dry ingredients.
- These bars can be served warm or at room temperature.
- Prep Time: 15 minutes
- Cook Time: 30 minutes
- Category: Dessert
- Method: Baking
- Cuisine: American
- Diet: Vegetarian
Nutrition
- Serving Size: 1 bar
- Calories: 250
- Sugar: 18g
- Sodium: 125mg
- Fat: 12g
- Saturated Fat: 7g
- Unsaturated Fat: 4g
- Trans Fat: 0g
- Carbohydrates: 35g
- Fiber: 1g
- Protein: 3g
- Cholesterol: 30mg
Keywords: Easter Egg Cookie Bars, holiday treats, dessert recipes