
Introduction to DIY Hot Chocolate Bombs
Have you ever dreamed of crafting a delightful masterpiece that brings comfort and joy with every sip? If so, the answer lies in DIY Hot Chocolate Bombs! These whimsical treats have taken the cozy beverage world by storm, offering a delightful blend of fun and flavor. With their charming appearance and an explosion of taste, they’re not just a drink but a full experience.
Why DIY Hot Chocolate Bombs Are the Perfect Treat
DIY Hot Chocolate Bombs are incredibly versatile and can be customized to fit anyone’s taste. Imagine creating your own flavor combinations: rich dark chocolate filled with creamy marshmallows, or perhaps a hint of peppermint for the holidays—endless possibilities await! According to a recent study by the National Confectioners Association, homemade treats are thriving, bringing families together in the kitchen and fostering creativity.
Making these chocolate delights is not just enjoyable; it also allows you to control the quality of ingredients. You can choose premium chocolate and organic add-ins, ensuring each bite is as indulgent and nourishing as possible. Plus, DIYing your hot chocolate bombs can save you money compared to purchasing them from specialty shops, where prices can skyrocket for artisanal versions.
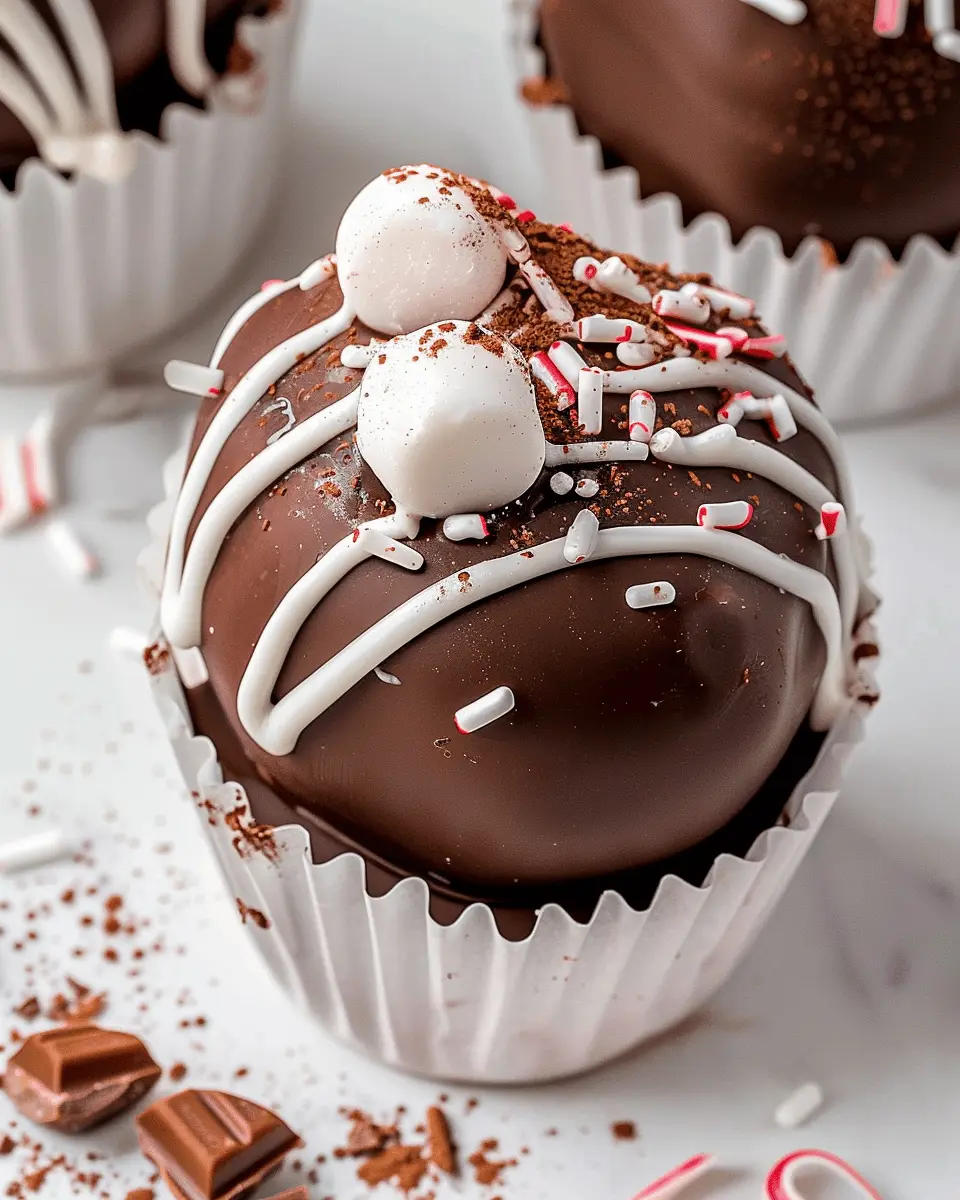
But what’s truly special about DIY Hot Chocolate Bombs is how they elevate any gathering. Whether it’s a cozy night in, a festive holiday party, or even a casual get-together with friends, serving these treats can make you the star of the evening. Picture this: a beautiful presentation of hot chocolate bombs waiting to be dropped into steaming mugs of milk, surrounded by laughter and warmth.
And let’s be honest, does anything scream “comfort” quite like a warm drink on a chilly day? Knowing how to create these delightful bombs opens the door to endless sharing opportunities. Gift them to friends or create a fun activity during a get-together. Celebrating small moments shouldn’t be overlooked—it’s these little joys that enrich our lives.
So grab your apron, and let’s embark on this delicious adventure together! Check out this guide for more ideas and inspiration on crafting the best DIY Hot Chocolate Bombs. Stay tuned for the full recipe that will spark your imagination and taste buds!
Ingredients for DIY Hot Chocolate Bombs
Essential ingredients for delicious hot chocolate bombs
Creating sensational DIY hot chocolate bombs is simpler than you might think! The heart of your hot chocolate bomb lies in these essential ingredients:
- Chocolate: Choose high-quality milk or dark chocolate, which forms the shell of your bombs. A good chocolate can make all the difference!
- Cocoa Powder: For that rich, chocolaty flavor, unsweetened cocoa powder adds a delightful touch.
- Sugar: Depending on your sweetness preference, granulated sugar does the trick for a comforting taste.
- Marshmallows: Mini marshmallows or themed marshmallows add an extra layer of fun.
- Flavor enhancers: Consider vanilla or peppermint extract to elevate the taste.
Optional ingredients for fun variations
The beauty of these DIY hot chocolate bombs is in customizing them to your liking! Here are some optional ingredients you might enjoy:
- Sea Salt: A sprinkle can balance the sweetness beautifully.
- Turkish Delights or Candy Canes: For a holiday twist, chop these into pieces and mix them in.
- Decorative Sprinkles: Brighten up your bombs with festive sprinkles that add color and flair.
With just these ingredients, you can easily whip up a delightful treat that warms the heart and soul. Looking for more ways to personalize your hot chocolate? Check out resources on making flavored hot chocolates or homemade marshmallows.
Preparing DIY Hot Chocolate Bombs
Creating your own DIY hot chocolate bombs is not only a delightful way to indulge in a cozy beverage, but it’s also a fun project that you can enjoy alone or with friends. With a few simple steps, you’ll impress yourself and anyone lucky enough to receive one. Let’s dive into the delightful process!
Gather your equipment and ingredients
To kick things off, you’ll need to assemble your equipment and ingredients. This is crucial! Here’s what you should have on hand:
Equipment:
- Silicone mold (round, sphere-shaped)
- Microwave-safe bowl or double boiler
- Spoon or spatula
- Baking sheet
- Piping bag (optional, but helpful for decoration)
- Storage container for the finished products
Ingredients:
- 1 ½ cups of chocolate (dark, milk, or white – pick your favorite!)
- 1 cup hot chocolate mix (store-bought or homemade)
- Mini marshmallows (because who doesn’t love marshmallows?)
- Optional toppings: crushed peppermint, sprinkles, or decorative chocolate drizzles
Got everything ready? Perfect! Now let’s move on to the next step.
Melt the chocolate
The next step in your DIY hot chocolate bombs adventure is to melt the chocolate. If you’re using a microwave, chop your chocolate into small, even pieces. Place them in a microwave-safe bowl and heat in 30-second intervals, stirring in between to ensure even melting and to prevent burning. Alternatively, you can use a double boiler for a gentler melting process, which is a favorite among many bakers.
One expert tip: Use chocolate that is specifically meant for melting. It has a smoother finish and melts evenly. Your melted chocolate should be glossy and have a smooth consistency—just what you want for your chocolate spheres!
Mold the chocolate spheres
With your chocolate perfectly melted, it’s time to mold the chocolate spheres. Using a spoon, fill the silicone mold halves with the melted chocolate. Make sure to spread it evenly to create strong shells. You’ll want the chocolate to be thick enough to hold up later, so don’t be shy about layering on that chocolate!
Once filled, place the mold into the freezer for about 10-15 minutes. This allows the chocolate to harden properly and gives you those lovely (and strong) shells we’re looking for.
Fill the spheres with hot chocolate mix and marshmallows
Once your chocolate shells are set, carefully remove them from the mold. Here comes the fun part—fill half of the spheres with a heaping tablespoon of hot chocolate mix and a generous sprinkle of mini marshmallows. You can really get creative here! Add toppings like crushed peppermint for a holiday twist or even flavored syrup powders to impress your taste buds.
Seal the bombs and decorate
To seal your hot chocolate bombs, you’ll need to warm a plate. This is where your chocolate melting skills come in handy again! Take one of the empty halves and carefully melt the edge on the warm plate, then press it onto a filled half. To make it extra special, you can use a piping bag filled with melted chocolate to drizzle over the bombs or add some fun sprinkles as an eye-catching decoration.
Allow the bombs to set again by placing them in the refrigerator for a few minutes. Once hardened, you’ve successfully created your very own DIY hot chocolate bombs!
These festive treats make great gifts for friends or a cozy night in. Just remember, when you drop them into a steaming cup of milk, stand back and watch the magic happen. You’re going to love this project! If you’re looking for inspiration or tips, check out resources from sites like Food Network or Pillsbury. Happy bomb-making!
Variations on DIY Hot Chocolate Bombs
When it comes to DIY hot chocolate bombs, the fun doesn’t stop at the basic recipe! Here are some delightful ways to customize your creations and impress your friends and family.
Ways to Customize Your Hot Chocolate Bombs
The beauty of hot chocolate bombs lies in their versatility. Want a peanut butter twist? Simply add a dollop of creamy peanut butter to your chocolate mix. Prefer something fruity? Toss in freeze-dried strawberries or raspberries for a pop of flavor. Here are some ideas to get your creative juices flowing:
- Flavor Infusions: Experiment with flavored extracts like peppermint, almond, or coconut. Just a few drops can elevate your bomb from ordinary to extraordinary.
- Textural Additions: Incorporate crunchy elements like crushed graham crackers for a s’mores vibe, or even mini marshmallows for that classic hot cocoa feel.
- Aromatic Touches: This is also where spices can shine! A sprinkle of cinnamon or a dash of cayenne can create a warm, inviting experience.
Holiday-Themed Hot Chocolate Bombs
Make any celebration sweeter with themed DIY hot chocolate bombs that capture the essence of the season. For a festive touch, consider these:
- Christmas Cheer: Use red and green chocolate coatings, and fill your bombs with crushed peppermint candies for a holiday flavor burst.
- Valentine’s Day: Opt for pink or red chocolate, and consider adding heart-shaped sprinkles for a romantic touch.
- Halloween Treats: Use orange chocolate and fill with ghostly marshmallows or spooky candy eyes.
By creatively customizing your hot chocolate bombs, you not only infuse your personality into each bite but also create memorable experiences for your loved ones. If you’re curious about other tasty hot beverage ideas, check out this great guide on seasonal drinks. Happy bomb-making!
Cooking Tips and Notes for DIY Hot Chocolate Bombs
Creating delicious DIY Hot Chocolate Bombs is not just a fun activity; it’s a chance to make something uniquely yours! Here are some essential tips to ensure your chocolate bombs turn out perfectly every time.
Tips for Success in Making Chocolate Bombs
-
Use Quality Chocolate: Start with high-quality chocolate for the best flavor. Look for couverture chocolate, known for its smooth texture and rich taste. This will make your hot chocolate experience extra luxurious!
-
Proper Tempering: If you want a beautiful sheen and snap, temper your chocolate correctly. This technique prevents blooming and keeps your DIY Hot Chocolate Bombs looking professional. Check out resources like this detailed guide on chocolate tempering from Serious Eats.
-
Silicone Molds: Invest in good silicone molds for easy release. They can make a huge difference, as your bombs will come out seamlessly without breaking.
-
Experiment with Fillings: Don’t hesitate to mix it up! Marshmallows, flavored syrups, or even a sprinkle of sea salt can elevate your hot chocolate bombs to the next level.
By keeping these tips in mind, you’re sure to impress family and friends with your homemade treats. Happy cooking!

Serving Suggestions for DIY Hot Chocolate Bombs
How to serve and enjoy your hot chocolate bombs
There’s something enchanting about watching your DIY Hot Chocolate Bombs dissolve into a creamy mug of cocoa. Start by placing a hot chocolate bomb in a cup, and pour over steaming milk (or a non-dairy alternative!). Watch the chocolate sphere burst open, releasing marshmallows and cocoa mix for a delightful treat. For that extra touch, sprinkle some cinnamon or a dash of vanilla extract on top.
Pairing ideas for a complete hot chocolate experience
To elevate your hot chocolate game, consider these delicious pairings:
- Sweet Treats: Think s’mores, cookies, or even a slice of cheesecake.
- Savory Bites: Pair with Turkey Bacon or Chicken Ham wraps for a satisfying contrast.
- Beverage Complements: Alongside your hot chocolate, enjoy a steaming cup of herbal tea or fresh coffee to balance the sweetness.
If you love exploring recipes, check out this guide for creative dessert ideas! The combination of flavors will make every sip of your DIY Hot Chocolate Bombs even more enjoyable.
Time breakdown for DIY Hot Chocolate Bombs
Creating DIY Hot Chocolate Bombs is a fun project that fits perfectly into your cozy afternoons. Here’s how much time you’ll need to whip up these delightful treats.
Preparation time
Getting everything ready will take about 20-30 minutes. You’ll be melting chocolate, filling molds, and adding your favorite mix-ins like marshmallows and cocoa powder.
Freezing time
Once prepped, let your chocolate bombs chill for about 30 minutes in the freezer. This will help them set perfectly so they hold their shape when dropped into warm milk.
Total time
In total, you should expect to allocate around an hour for this DIY project. With minimal time investment, you’ll have a gourmet treat that’s perfect for gifts or a cozy night in with friends. For more on the benefits of hot chocolate, check out resources like Healthline.
These DIY Hot Chocolate Bombs are not just easy to make; they’re a delightful way to enjoy winter evenings!
Nutritional Facts for DIY Hot Chocolate Bombs
Calories per Serving
When indulging in your DIY Hot Chocolate Bombs, it’s good to know what you’re treating yourself to. On average, each bomb contains about 150-200 calories. This delicious treat can be a cozy addition to your evening routine, perfect for unwinding after a long day.
Sugar Content
One of the biggest considerations is the sugar content. Depending on the ingredients you choose, each hot chocolate bomb can have around 10-15 grams of sugar. If you’re looking to make a lower-sugar version, consider replacing some of the sweetened cocoa or using sugar alternatives.
Other Nutritional Highlights
Aside from the indulgent flavors, these DIY Hot Chocolate Bombs can also provide a few surprising benefits:
- Antioxidants: Quality cocoa is packed with antioxidants, which can help combat oxidative stress in the body.
- Calcium: If you add milk to your hot chocolate, you’ll benefit from calcium—essential for bone health.
- Customizable: You can easily adjust the ingredients to boost fiber or protein—try adding a scoop of protein powder or using almond milk for a dairy-free option!
For more in-depth information on nutrition, you might check out Harvard Health or consider nutrition-focused blogs that dive deeper into chocolate benefits.
When crafting your DIY Hot Chocolate Bombs, remember that it’s all about balance and enjoyment. Treat yourself, but also consider your nutritional goals!
FAQs about DIY Hot Chocolate Bombs
How long do hot chocolate bombs last?
When it comes to storing your delightful DIY hot chocolate bombs, you’ll be pleased to know they have a generous shelf life! If kept in a cool, dry place, they typically last for about 2-3 months. Just make sure they’re stored in an airtight container to keep them fresh and prevent moisture from affecting that beautiful chocolate shell. If you want to know more about proper storage, check out this guide from FoodSafety.gov on how to store homemade treats safely.
Can I use different types of chocolate?
Absolutely! One of the best things about making DIY hot chocolate bombs is the endless customization options. You can use milk chocolate for a classic taste, dark chocolate for a richer flavor, or even white chocolate for a sweeter twist. Experimenting with flavored chocolates, like mint or caramel, can also take your creations to the next level. The only thing to remember is that different chocolates can melt at different rates, so keep an eye on your melting times.
Are hot chocolate bombs safe for kids?
Yes, DIY hot chocolate bombs are generally safe for kids—with proper supervision. The ingredients are child-friendly, and making them can be a fun, family-friendly activity! Just be cautious if you’re using any potential allergens like nuts or gluten in your additions. Additionally, you could even involve kids in the decorating process, making it a delightful bonding experience. Always ensure that kids are supervised while handling hot liquids for safety.
By addressing these common questions, I hope your hot chocolate bomb-making venture is as smooth and enjoyable as that first sip of rich, melted chocolate goodness!
Conclusion on DIY Hot Chocolate Bombs
Wrapping up the joy of homemade hot chocolate delights
Creating your own DIY Hot Chocolate Bombs is not just a tasty treat; it’s a delightful experience that sparks joy during the colder months. Imagine seeing the thrill on a friend’s face as they watch the chocolate melt into a warm, rich cup of cocoa! Not only are these bombs customizable to fit your taste—whether you prefer marshmallows or peppermint—they also make for a perfect gift or a cozy night in.
So gather your ingredients, and bring a little magic into your kitchen. Whether you’re sharing with loved ones or indulging solo, these hot chocolate bombs promise to make each moment sweeter. For more tips and variations, check out resources like The Kitchn and BBC Good Food to elevate your hot chocolate game!

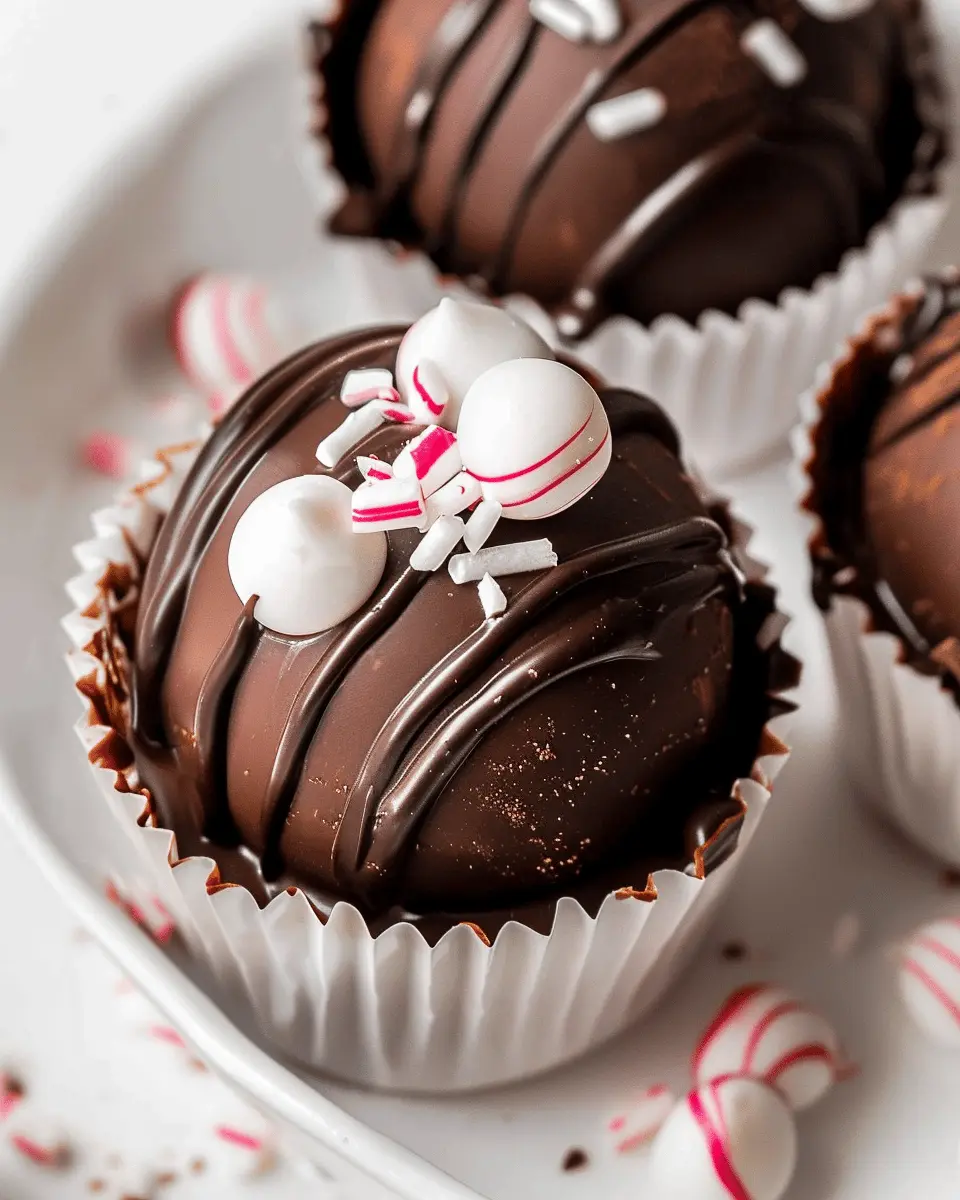
DIY Hot Chocolate Bombs: The Best Cozy Treat for Cold Nights
Learn how to make delicious DIY hot chocolate bombs that are perfect for warming up on cold nights.
- Total Time: 30 minutes
- Yield: 12 bombs 1x
Ingredients
- 1 cup chocolate chips
- ½ cup hot cocoa mix
- ½ cup mini marshmallows
- 1 teaspoon vanilla extract
Instructions
- Melt the chocolate chips in a microwave-safe bowl.
- Use silicone molds to form the chocolate shells.
- Fill half of the molds with hot cocoa mix and mini marshmallows.
- Seal the molds and refrigerate until set.
- Pop the hot chocolate bombs out of the molds and store them in an airtight container.
Notes
- Experiment with different types of chocolate for varied flavors.
- Add toppings like crushed peppermint or sprinkles for a fun twist.
- Prep Time: 20 minutes
- Cook Time: 10 minutes
- Category: Dessert
- Method: No-Bake
- Cuisine: American
- Diet: Vegetarian
Nutrition
- Serving Size: 1 bomb
- Calories: 150
- Sugar: 12g
- Sodium: 20mg
- Fat: 7g
- Saturated Fat: 4g
- Unsaturated Fat: 2g
- Trans Fat: 0g
- Carbohydrates: 18g
- Fiber: 1g
- Protein: 2g
- Cholesterol: 5mg
Keywords: DIY Hot Chocolate Bombs, hot chocolate, cozy treats