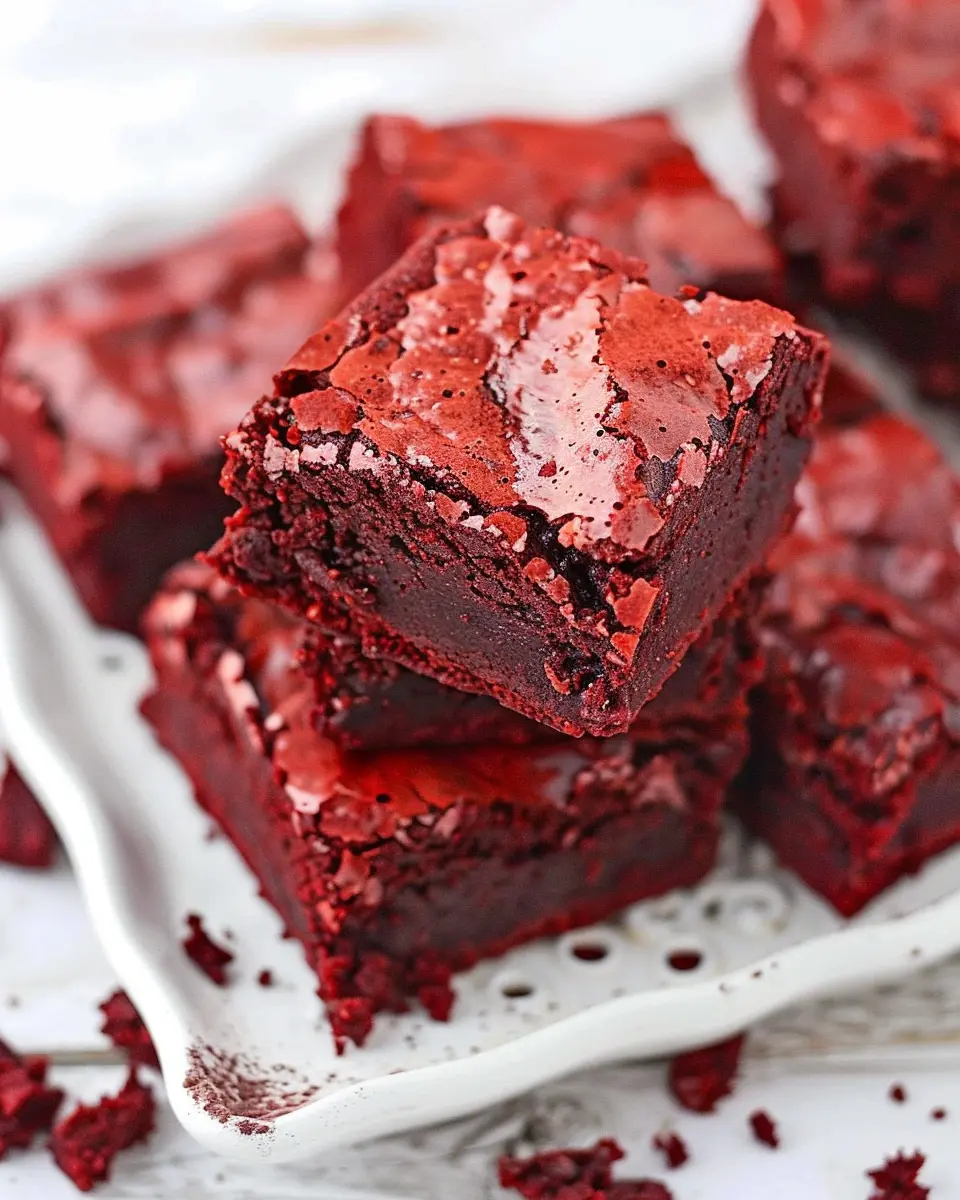
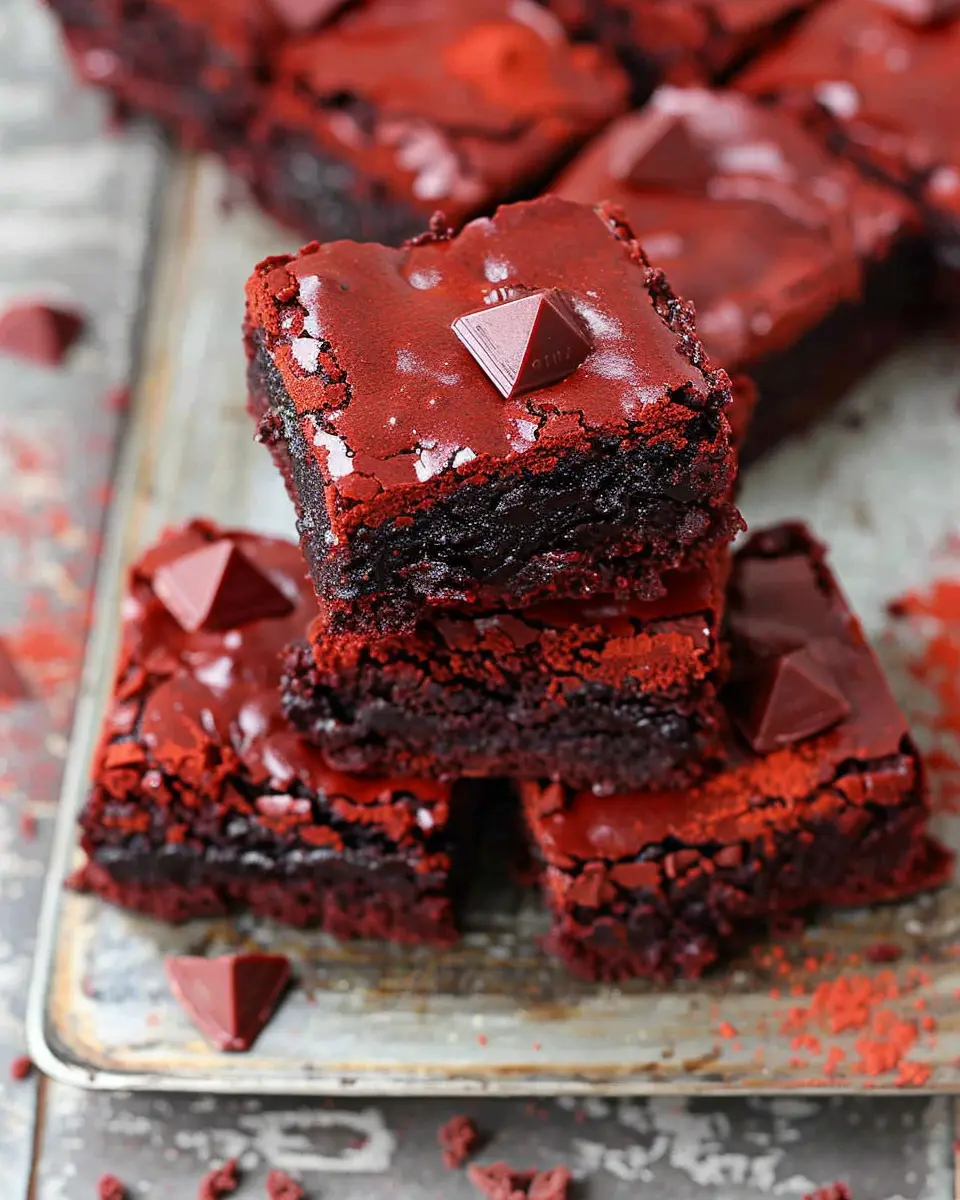
Introduction to Best Homemade Red Velvet Brownies
If you’re a young professional juggling the demands of a busy career, you know that finding the perfect treat to indulge in can feel like a Herculean task. Enter the best homemade red velvet brownies. These decadent delights not only bring a splash of color to your dessert table but also deliver a unique flavor that combines the richness of chocolate with the subtle tang of buttermilk.
Imagine coming home after a long day, slipping into your comfy clothes, and treating yourself to a warm brownie that melts in your mouth. Perfect for sharing with friends or enjoying solo, these brownies are tailored for anyone who appreciates a great dessert without the fuss. Plus, they offer a creative twist on traditional brownies, making them an eye-catching centerpiece at any gathering.
Why Red Velvet Brownies Are the Ultimate Dessert Choice for Young Professionals
For young professionals who often find themselves stressed and craving comfort food, red velvet brownies stand out for several reasons:
- Unique Flavor Profile: The blend of cocoa powder and buttermilk gives these brownies a flavor that’s both rich and slightly tangy, taking the classic chocolate brownie to new heights.
- Visual Appeal: The striking red hue creates an inviting presentation, perfect for impressing guests at a dinner party or simply brightening up your day.
- Versatility: Whether you enjoy them plain, topped with cream cheese frosting, or complemented by a scoop of vanilla ice cream, the best homemade red velvet brownies can be adapted to fit any occasion.
- Quick and Easy to Make: With minimal prep time and common ingredients, even the busiest professionals can whip these up in no time. If you’re short on time, check out recipes that offer shortcuts, such as this one from Bon Appétit.
Not to mention, baking can be a fantastic way to unwind and destress. There’s something incredibly satisfying about creating something delicious, especially when it comes together as effortlessly as these brownies do.
So why not treat yourself to a batch of best homemade red velvet brownies? You’ll find that they’re not just a sweet indulgence, but also a delightful escape from your daily grind.
Ingredients for Best Homemade Red Velvet Brownies
Essential Ingredients for Rich and Decadent Brownies
Creating the best homemade red velvet brownies starts with the right ingredients. You’ll want to gather the following staples for that rich, vibrant treat:
- All-purpose flour: This gives your brownies their structure.
- Granulated sugar: For that perfect balance of sweetness.
- Unsweetened cocoa powder: Essential for that classic chocolate flavor.
- Vegetable oil: Keeps your brownies moist and chewy.
- Eggs: Helps bind everything together and adds to the richness.
- Red food coloring: The star of the show for that signature red hue.
- Buttermilk: Adds a delightful tanginess and helps keep the brownies tender.
- Baking powder and salt: These will elevate your brownies and enhance their flavor.
Optional Ingredients for Customization
Now, let’s get creative! You can personalize your best homemade red velvet brownies with:
- Chocolate chips: For extra gooeyness and chocolate depth.
- Nuts (like walnuts or pecans): Add a satisfying crunch.
- Cream cheese frosting: Elevate your brownies to a whole new level of indulgence.
- Vanilla extract: A hint of warmth to complement the cocoa.
Feel free to experiment with these options or add your own twist! For more baking tips, check out this helpful guide from Joy of Baking. Happy baking!
Step-by-step Preparation of Best Homemade Red Velvet Brownies
There’s something utterly delightful about sinking your teeth into a fudgy, red velvet brownie. If you’re curious about how to make the best homemade red velvet brownies, you’re in for a treat! Let’s dive right into the step-by-step process to create these scrumptious sweets.
Preheat the oven and prepare your baking pan
Start by preheating your oven to 350°F (175°C). This step is crucial because a well-preheated oven ensures the brownies bake evenly. While the oven warms up, grab a square baking pan (preferably 9×9 inches) and line it with parchment paper. This makes it easy to pull out the brownies later, and it also simplifies cleanup. If you don’t have parchment paper, a light greasing with cooking spray works, too!
Melt the chocolate and butter
In a microwave-safe bowl, combine ½ cup of unsweetened cocoa powder, ½ cup (1 stick) of unsalted butter, and 4 ounces of high-quality dark chocolate. Heat in the microwave in short bursts (about 30 seconds each) until everything is melted and smoothly combined. Be careful not to overheat—burnt chocolate can ruin your brownies! Stir thoroughly until silky and set aside to cool slightly.
Combine eggs, vanilla, and sugars
Next, in a large mixing bowl, add 2 large eggs, 1 teaspoon of vanilla extract, and 1 cup of granulated sugar along with ½ cup of brown sugar. These sugars will give your brownies that ideal balance of sweetness and moisture. Whisk these ingredients together until they’re light and frothy. It’s the perfect moment to think about the joy you’re about to spread with these best homemade red velvet brownies!
Mix in the red food coloring and chocolate mixture
Once your chocolate mixture has cooled a bit (you don’t want to scramble the eggs!), add it to the egg and sugar blend. Now comes the fun part: add 2 tablespoons of red food coloring. The classic red hue is what makes red velvet special, after all! Blend everything until well incorporated—your mixture will take on that eye-catching red color.
Combine dry ingredients and fold into the mixture
In another bowl, whisk together 1 cup of all-purpose flour, ½ teaspoon of baking powder, and ½ teaspoon of salt. Gradually fold the dry ingredients into the wet mixture. Be gentle—overmixing can lead to dense brownies instead of the desired fudginess. You want just to combine until no dry flour remains visible.
Bake and cool
Pour the brownie batter into your prepared baking pan and spread it evenly. Bake in the preheated oven for about 20-25 minutes. Keep an eye on them; the brownies are done when a toothpick inserted in the center comes out with a few moist crumbs (but not wet batter!). Once baked, remove them from the oven and let them cool in the pan on a wire rack.
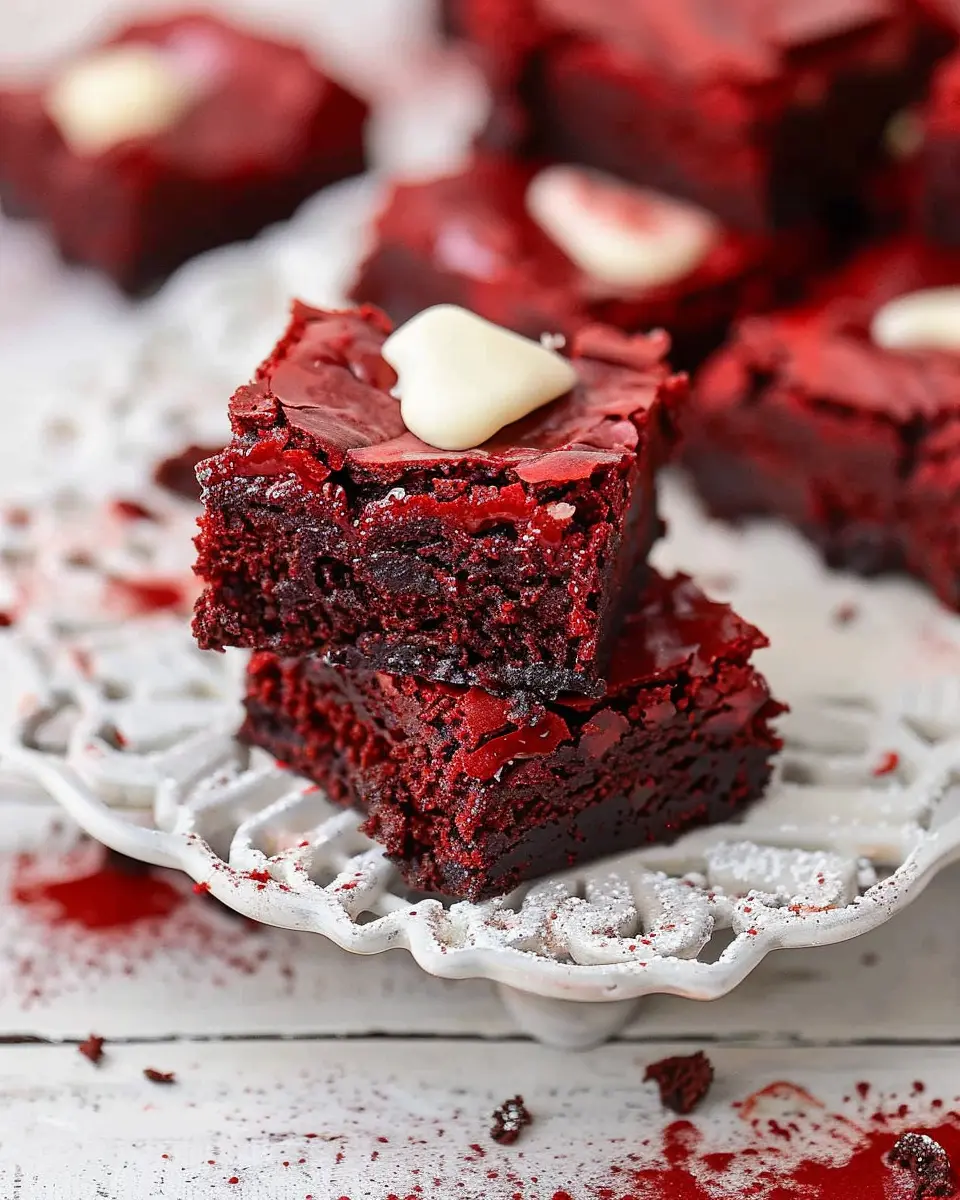
Prepare the cream cheese frosting
While your brownies cool, why not whip up a delightful cream cheese frosting? Beat together 8 oz of softened cream cheese, ½ cup of unsalted butter, 2 cups of powdered sugar, and 1 teaspoon of vanilla extract until fluffy. This creamy topping perfectly complements the rich brownie base and adds a delightful tang.
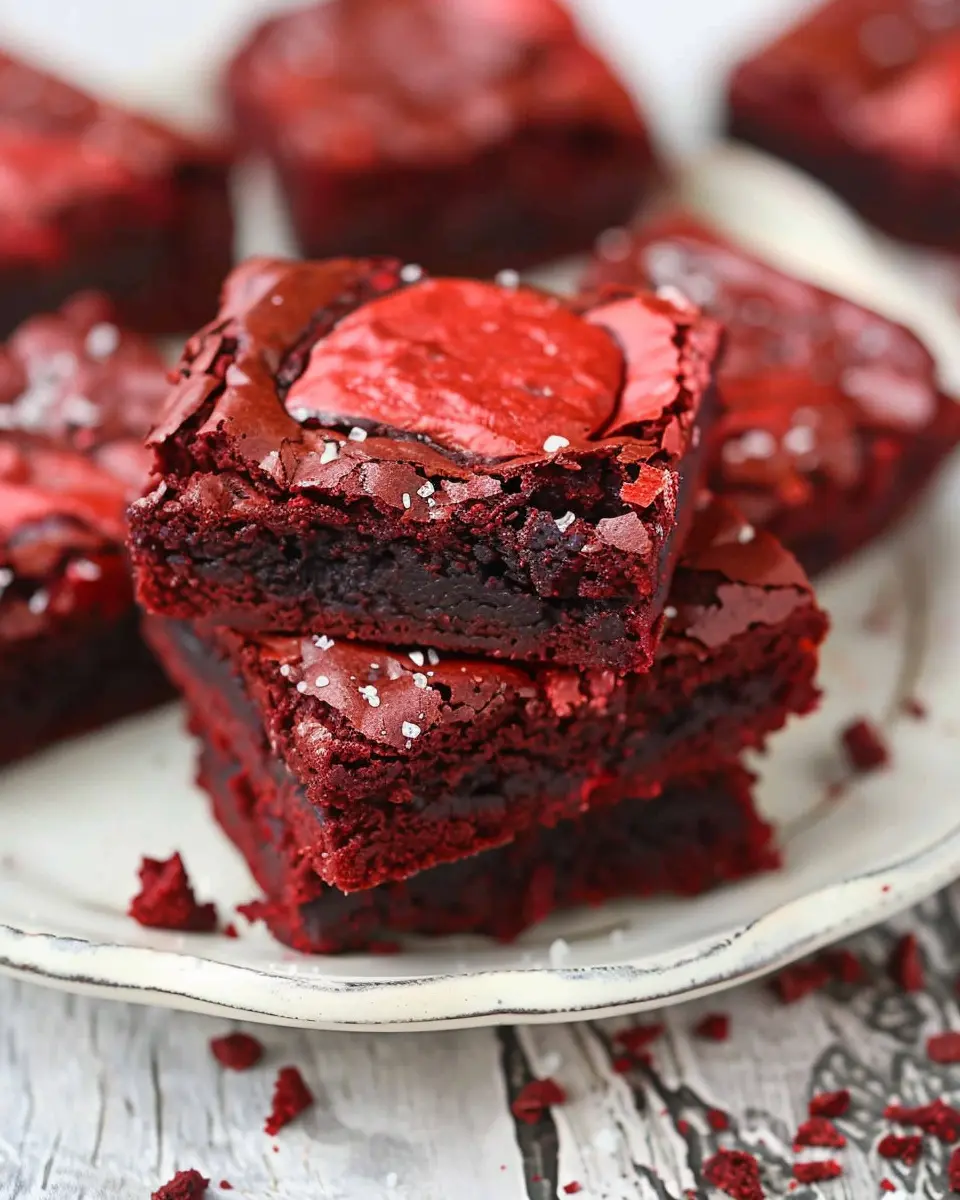
Frost the brownies
Once the brownies have cooled completely, lift them out of the pan using the edges of the parchment paper. Spread an even layer of cream cheese frosting over the top, and voilà—your best homemade red velvet brownies are ready to impress! For an extra touch, sprinkle them with some cocoa powder or chocolate shavings.
As you dive into these decadent treats, remember that they’re perfect for sharing, or, let’s be honest, for savoring all by yourself! Enjoy every rich bite.
Variations on Best Homemade Red Velvet Brownies
When it comes to the best homemade red velvet brownies, there’s always room for creativity! You can easily switch up the classic recipe to add your own spin or cater to dietary preferences. Let’s explore some delicious variations to elevate your brownie game.
Red Velvet Brownies with Nuts for Added Crunch
One of the simplest ways to enhance your brownies is by adding a bit of texture. Try tossing in some chopped walnuts or pecans into your brownie batter. The nuts provide a delightful crunch that contrasts beautifully with the soft, fudgy center. Plus, they add healthy fats and protein, making your indulgence a bit more wholesome. Just be sure to chop your nuts finely so they distribute evenly throughout each decadent bite!
Vegan Red Velvet Brownies for Everyone
No one should miss out on the rich goodness of red velvet brownies, even if they follow a vegan lifestyle. Replacing traditional dairy and eggs is easier than you might think. Substitute the eggs with flaxseed meal or applesauce to maintain moisture and binding. For the butter, opt for coconut oil or a plant-based butter alternative. The beauty of this variation is that it tastes just as good as the original—trust me! Curious about more vegan solutions? Check out Plant-Based Cooking for tips on how to craft delicious vegan desserts.
Feel free to experiment with these variations to find your perfect version of the best homemade red velvet brownies. Who knows? You may just discover your new favorite treat!
Cooking Tips and Notes for Best Homemade Red Velvet Brownies
Tips for perfect brownies every time
To create the best homemade red velvet brownies, the key is in the details. Start by measuring your ingredients accurately—too much flour can lead to dryness. Use room temperature eggs and butter for better mixing, and don’t skip the step of sifting your dry ingredients for a smoother batter. For a rich flavor, try adding a pinch of sea salt to enhance the chocolate notes (and remember, a little goes a long way!).
Common mistakes to avoid
Many budding bakers find themselves falling into a few common traps. One major pitfall is overmixing the batter, which can make your brownies tough. Gently fold the ingredients until just combined. Also, ensure your oven is preheated to the right temperature—unexpected fluctuations can lead to uneven baking. Lastly, resist the urge to cut into your brownies immediately; giving them time to cool will enhance their fudgy texture.
For more insights on baking tips, you might find this guide on perfect brownie techniques helpful!
Serving Suggestions for Best Homemade Red Velvet Brownies
When it comes to the best homemade red velvet brownies, how you present and serve them can elevate your dessert game significantly! Here are some tips to ensure they shine at your next gathering.
Creative Ways to Present Your Brownies
Presentation matters! Consider cutting your brownies into fun shapes using cookie cutters. You could also stack them in a tall glass and drizzle with cream cheese frosting for a parfait-style treat. A sprinkle of edible glitter or colored sugar on top can add a festive touch for special occasions. Don’t forget to peruse some ideas on food presentation from websites like Food52.
Pairing Ideas for a Delightful Dessert Experience
To create a balanced flavor profile, think about pairing your best homemade red velvet brownies with different accompaniments:
- Serve with a scoop of vanilla ice cream or a dollop of whipped cream for a classic treat.
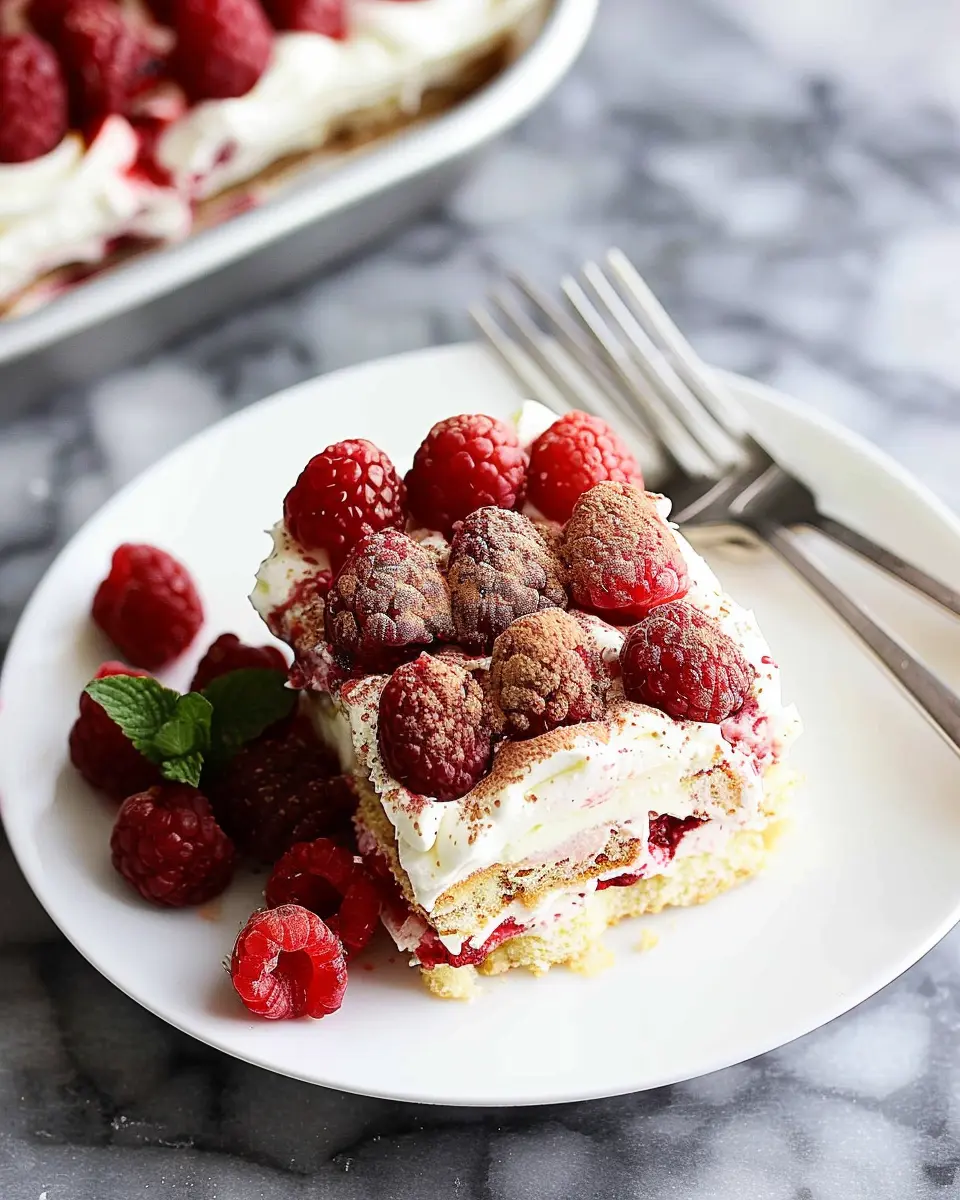
- Try them with fresh berries, like strawberries or raspberries, to add a tart contrast.
- For a warm touch, drizzle some cream cheese frosting or a rich chocolate sauce over the top.
By combining these elements, you’ll create a delightful dessert experience that your friends will rave about!
Time Breakdown for Best Homemade Red Velvet Brownies
When it comes to whipping up the best homemade red velvet brownies, knowing your time allocation can make all the difference. Let’s break it down!
Preparation Time
You’ll need about 20 minutes to gather your ingredients and mix everything together. This is the fun part, where you can get a little creative with your process!
Baking Time
Once your batter’s ready, pop it in the oven for 25 to 30 minutes. Keep an eye on it; you’ll want a toothpick to come out clean for that perfect texture.
Total Time
In just about 50 to 60 minutes, you can have these deliciously rich brownies ready to impress friends and family. Who knew deliciousness could be this quick? For more tips on baking and ingredient selection, check out resources like Bon Appétit and Serious Eats for expert insights!
Nutritional Facts for Best Homemade Red Velvet Brownies
When indulging in the best homemade red velvet brownies, it’s important to know their nutritional impact.
Calories per brownie
Each brownie typically contains around 200-250 calories, depending on portion size and specific ingredients used. If you’re concerned about your caloric intake, consider adjusting the recipe with alternatives like applesauce or reducing the sugar.
Fat and sugar content
These delightful brownies pack about 10-15 grams of fat and around 15-20 grams of sugar per serving. Most recipes feature butter and sugar for that rich taste, but you can experiment with healthier substitutes. For a more balanced treat, try incorporating Greek yogurt or experimenting with lower-sugar options.
For a deeper dive into nutritional insights, check out the USDA FoodData Central for detailed ingredient info. Remember, moderation is key—enjoy your best homemade red velvet brownies guilt-free!
FAQs about Best Homemade Red Velvet Brownies
Can I make best homemade red velvet brownies ahead of time?
Absolutely! Making red velvet brownies ahead of time can be a real lifesaver. You can prepare the batter and store it in the refrigerator for up to 24 hours until you’re ready to bake. If you’ve already baked them, allow your brownies to cool completely, then wrap them tightly in plastic wrap or place them in an airtight container. They can be stored at room temperature for up to 3 days or frozen for up to 3 months. When you’re ready to indulge, simply thaw them overnight in the fridge and enjoy!
What should I do if my brownies are too cakey?
If your best homemade red velvet brownies turned out too cakey, don’t be alarmed; it happens to the best of us! Here are a few tips:
- Reduce baking time: Check your brownies a few minutes early. They should be fudgy, not dry.
- Adjust your oven temperature: An oven that’s too hot can dry out the brownies. Consider using an oven thermometer for accuracy.
- Fudgier recipe adjustments: If you’re experimenting, try adding a bit more oil or butter to enhance the fudginess.
How can I store red velvet brownies properly?
To keep your red velvet brownies fresh and delicious, here’s how to store them:
- Room temperature: Keep them in an airtight container or cover them with plastic wrap for up to 3 days.
- Refrigerator: If you’re looking to extend their shelf life, store them in the fridge for up to a week. Just remember to let them come to room temperature before serving for the best taste.
- Freezing: For long-term storage, wrap individual brownies in plastic wrap and then in aluminum foil. They can be frozen for up to 3 months. Perfect for those late-night cravings!
These simple storage tips will help maintain flavor and texture! For even more brownie advice, check out resources from King Arthur Baking.
Conclusion on Best Homemade Red Velvet Brownies
When it comes to homemade desserts, the best homemade red velvet brownies truly deserve a top spot in your baking repertoire. With their rich, velvety texture and that signature festive color, these brownies are not just a treat for the taste buds but a feast for the eyes as well.
Imagine serving these at your next gathering, delighting guests with each chocolatey bite—it’s a sure conversation starter! Plus, they’re super easy to whip up, making them perfect for both novice and experienced bakers alike.
So why not give this recipe a try? You might just find a new favorite dessert that brings smiles to every table. For more delicious ideas, check out Baking at Home for tips and inspiration!
Print
Best Homemade Red Velvet Brownies: Decadent Delight for All
Indulge in the rich and flavorful experience of homemade red velvet brownies, a perfect treat for any occasion.
- Total Time: 45 minutes
- Yield: 12 servings 1x
Ingredients
- 1 cup all-purpose flour
- 1 cup granulated sugar
- 1/2 cup unsweetened cocoa powder
- 1/2 cup unsalted butter, melted
- 2 large eggs
- 1 tablespoon red food coloring
- 1 teaspoon vanilla extract
- 1/2 teaspoon baking powder
- 1/4 teaspoon salt
- 1 cup cream cheese, softened
Instructions
- Preheat your oven to 350°F (175°C) and grease a baking pan.
- In a bowl, whisk together flour, sugar, cocoa powder, baking powder, and salt.
- In another bowl, mix the melted butter, eggs, food coloring, and vanilla extract.
- Combine the wet and dry ingredients, then pour into the baking pan.
- In a separate bowl, beat the cream cheese until smooth and dollop it on top of the brownie batter.
- Swirl the cream cheese into the brownie batter with a knife.
- Bake for 25-30 minutes, or until a toothpick comes out clean.
- Let cool, then cut into squares and serve.
Notes
- Store brownies in an airtight container for up to one week.
- For extra flavor, add a sprinkle of sea salt on top before serving.
- Prep Time: 15 minutes
- Cook Time: 30 minutes
- Category: Dessert
- Method: Baking
- Cuisine: American
- Diet: Vegetarian
Nutrition
- Serving Size: 1 brownie
- Calories: 220
- Sugar: 18g
- Sodium: 150mg
- Fat: 10g
- Saturated Fat: 6g
- Unsaturated Fat: 4g
- Trans Fat: 0g
- Carbohydrates: 28g
- Fiber: 2g
- Protein: 3g
- Cholesterol: 50mg
Keywords: red velvet brownies, homemade desserts, brownies, baking