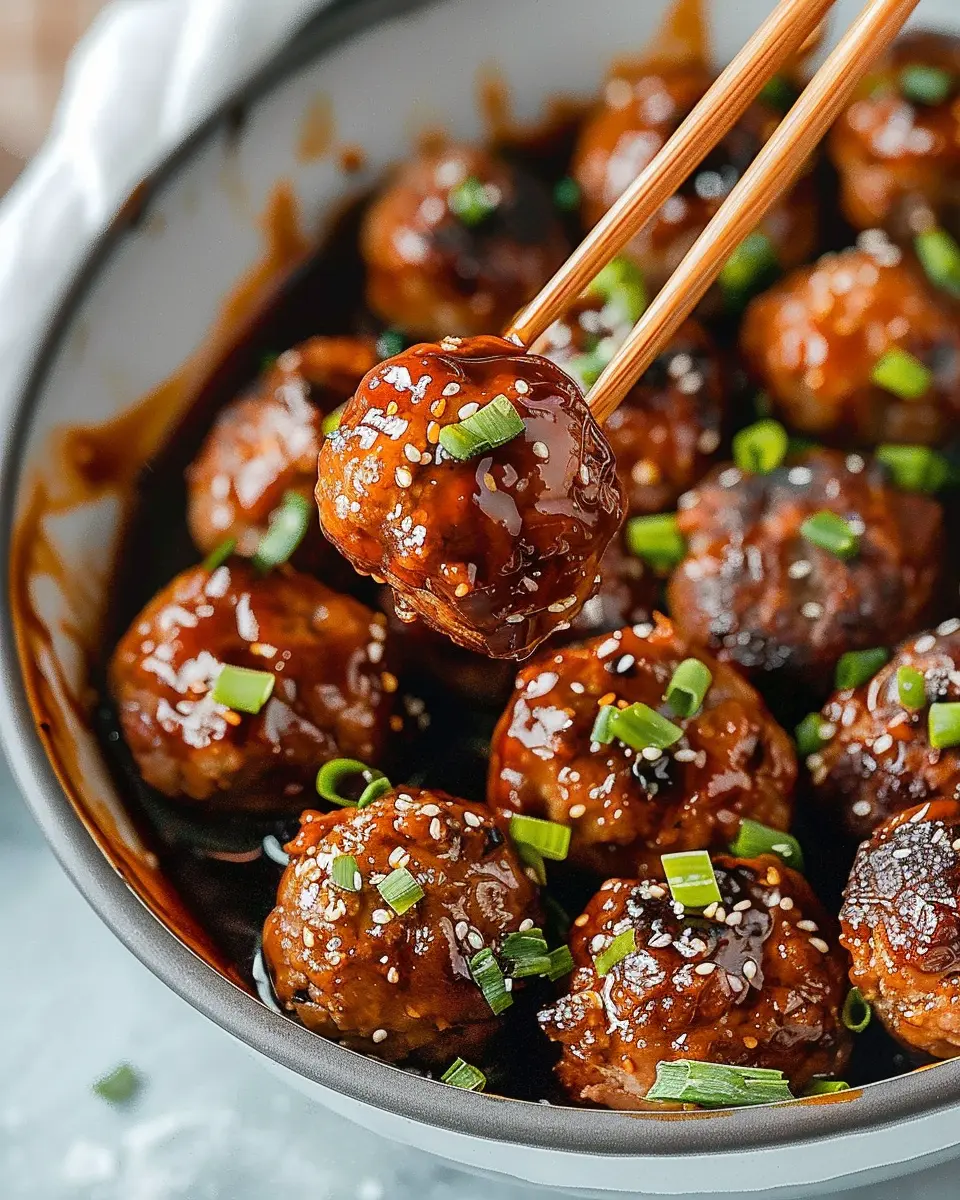

Introduction to Healthier Coxinhas
Why homemade coxinhas matter
When it comes to indulging in tasty treats, coxinhas hold a special place in our hearts, and making them at home adds a splash of personalization and control over the ingredients. These little Brazilian delights, traditionally made with dough filled with spiced chicken, carry a certain nostalgia. Whether you enjoyed them at a party, from a street vendor, or during a cozy night in, homemade coxinhas can bring back those cherished memories.
What’s even better? By opting for the healthier coxinhas version, you’re not just revamping a classic; you’re giving your taste buds a treat while keeping your body nourished. With the right substitutions—like swapping out regular chicken for chicken ham or even turkey bacon—you can enjoy that crispy exterior and flavorful filling without the worry that typically comes with fried snacks.
The allure of street food meets healthier choices
Street food has a magical way of connecting us to culture and community. It’s vibrant, it’s buzzing with life, and it’s often unpretentious. But with our fast-paced lifestyles, we’re often left questioning the nutritional value of these delicious bites. That’s where healthier coxinhas come in!
Imagine taking a bite of savory coxinhas while feeling good about what you’re eating. With a few thoughtful modifications, it’s possible to fuse that beloved street food experience with healthier choices. You can try replacing white flour with whole wheat or even gluten-free alternatives, and go for air frying instead of traditional deep frying. Not only will this make your coxinhas lighter, but you can also enjoy them without the hefty calorie count associated with typical street food.
Plus, by making these changes, you’re not sacrificing taste. Many chefs and food bloggers advocate for lighter versions of traditional dishes, citing that with the right ingredients, flavor can be enhanced rather than diminished. Curious about more cooking techniques? Resources like Serious Eats offer fantastic insights into various culinary adaptations.
So, next time the craving strikes, consider whipping up a batch of these healthier coxinhas! You’ll not only satisfy your appetite but also nourish your body with wholesome ingredients.

Ingredients for Healthier Coxinhas
Crafting healthier coxinhas doesn’t mean sacrificing flavor; instead, it’s all about smart substitutions and fresh ingredients. Let’s dive into what you’ll need to create these delightful bites without the guilt.
Filling components
For the filling, consider using:
- Shredded chicken breast: A lean protein that helps maintain muscle while being low in fat.
- Turkey bacon: This option delivers that smoky, savory flavor without the added fat of regular bacon.
- Chicken ham: A tasty alternative to traditional ham, it brings a savory edge while being lower in calories.
- Spices and fresh herbs: Don’t shy away! Use cilantro, parsley, and a sprinkle of paprika to add depth to the flavor.
Dough essentials
For the dough, opt for:
- Whole wheat or chickpea flour: These flours are higher in fiber and nutrients compared to regular white flour.
- Low-sodium vegetable broth: A flavorful liquid base that keeps your dough moist without excess sodium.
Coating necessities
To coat your coxinhas, choose:
- Panko breadcrumbs: These provide a crunchier texture compared to traditional breadcrumbs while being lighter.
- Egg whites: Instead of whole eggs, using just the whites helps reduce fat content.
By choosing these healthier ingredients, you can enjoy all the deliciousness of traditional coxinhas while making smarter choices. For more easy swaps, check out resources on healthier cooking for inspiration!
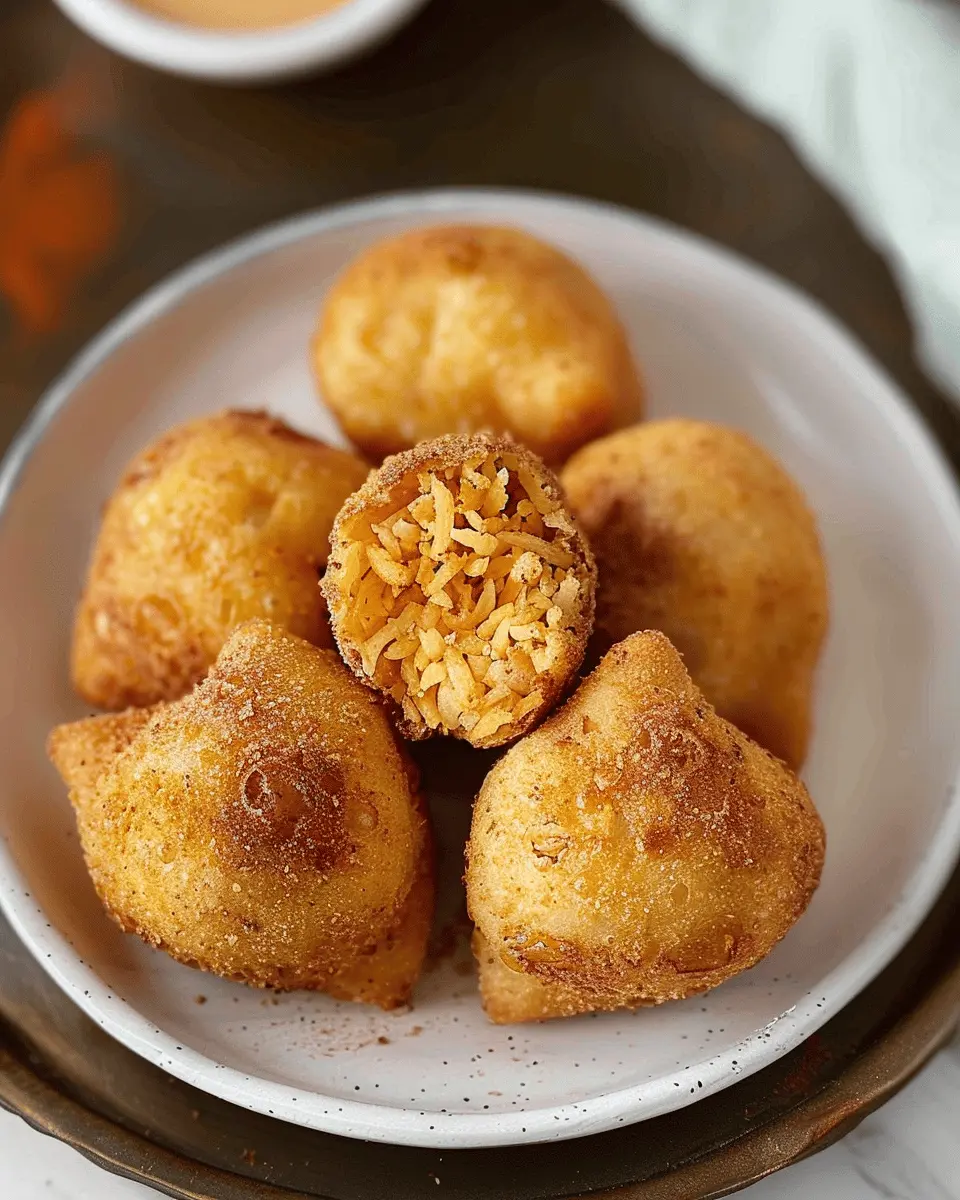
Step-by-step Preparation for Healthier Coxinhas
Are you craving the delightful experience of coxinhas but wish to keep things on the healthier side? You’re in for a treat with this step-by-step guide on crafting healthier coxinhas. This Brazilian delicacy doesn’t have to be a guilty pleasure; let’s walk through making them lighter and just as delicious!
Cooking and shredding the chicken
The foundation of any great coxinha is its filling, which of course begins with chicken. Start by selecting lean cuts like chicken breast. Here’s how you can prepare your chicken:
- Boiling: In a pot of boiling water, add seasoned chicken breasts along with some bay leaves and garlic for extra flavor. Cook for about 20-30 minutes or until the chicken is tender.
- Shredding: Once cooked, remove the chicken and let it cool slightly. Using two forks, shred the chicken into bite-sized pieces. This method not only preserves the moisture but also ensures you get that perfect texture without excess fat.
If you’re curious about more ways to prepare chicken, this webpage from Healthline offers great tips.
Making the filling
Now that you have your shredded chicken, it’s time to elevate its flavor profile. Here’s a simple filling mix:
- Ingredients:
- 1 cup shredded chicken
- 1/2 cup diced onions
- 1/2 cup chopped parsley
- Optional: 1/4 cup diced turkey bacon or chicken ham for added flavor
- Season with salt, pepper, and perhaps some spices like cumin or paprika.
In a skillet over medium heat, sauté the onions until translucent. Add the shredded chicken and any optional add-ins, mixing well. Cook for another few minutes, allowing the flavors to meld. This step will create a filling that is as delicious as it is nutritious.
Preparing the dough
Next up is the dough, which can be tricky but totally doable! Utilizing healthier components will keep these healthier coxinhas light.
- Ingredients:
- 1 cup whole wheat flour
- 1 cup low-sodium chicken broth
- Salt and pepper to taste
In a saucepan, bring the chicken broth to a boil. Slowly add the whole wheat flour while stirring to prevent lumps. Mix it until it forms a dough that pulls away from the sides of the pan. Allow it to cool before handling.
Shaping the coxinhas
Once the dough has cooled, it’s time to let your creativity shine in shaping these healthier coxinhas:
- Divide the dough into small balls.
- Flatten each ball into a small circle.
- Place a spoonful of the chicken filling in the center, then fold the dough over to create a teardrop shape.
- Pinch the edges to ensure no filling escapes during cooking.
Voila! You’ve just created the iconic shape of coxinhas.
Bread and coat the coxinhas
To keep our coxinhas on the healthier side while ensuring they still have that crispy finish, let’s skip the heavy batter:
- Breadcrumbs: Instead of traditional breading, use whole grain breadcrumbs or even a mixture of finely ground oats.
- Coat: Lightly brush each coxinha with an egg wash or an egg substitute for binding, and coat them in the breadcrumbs.
Air frying the coxinhas
Now for the best part—cooking! Air frying allows you to enjoy the crunch without the oil. Set your air fryer to 375°F and arrange the coxinhas in a single layer.
- Cook for about 15-20 minutes or until they are golden brown, flipping halfway through for even crispiness.
Not only does air frying significantly reduce calories, but it also keeps those healthier coxinhas crispy and delicious!
And just like that, you’re on your way to enjoying a delightful, guilt-free treat! Remember, these healthier coxinhas can be served with a side of fresh salsa or a light dipping sauce, providing the perfect accompaniment. Happy cooking!
Variations on Healthier Coxinhas
Vegetarian Coxinhas
Looking to enjoy the deliciousness of coxinhas without the meat? Healthier coxinhas can easily accommodate a vegetarian lifestyle. Consider using a savory mix of mushrooms, spinach, and cheese for a rich, umami flavor. Simply sauté chopped mushrooms and spinach together, add some crumbled feta or cream cheese for creaminess, and then fill your coxinha dough. Not only is this a fantastic way to sneak in some greens, but it also delivers a satisfying bite!
For an extra nutrient boost, you can also experiment with lentils or chickpeas. Both options are packed with protein and add a delightful texture. Perhaps you could even check out this article on plant-based proteins for more ideas!
Alternate Fillings for Coxinhas
The world of coxinha filling is pretty vast, so why not get creative? When dreaming up healthier coxinhas, think outside the traditional chicken. How about spicy turkey bacon and cheese, which gives that smoky flavor while remaining on the lighter side?
You can also explore:
- Beef and cheese: A zesty ground beef filling with cheddar provides a hearty option.
- Chicken ham and herbs: A delightful chicken ham filling seasoned with fresh herbs can elevate flavors.
- Vegetable medley: Roasted peppers, zucchini, and onions make for a robust filling that even meat-lovers will greatly enjoy.
Feeling adventurous? Try blending your chosen fillings with spices or sauces to create unique flavor profiles that can surprise and delight your taste buds. Whether you choose to stick with a classic or take a bold route, your healthier coxinhas are sure to impress!
Cooking Tips and Notes for Healthier Coxinhas
Ensuring a perfect filling consistency
When making healthier coxinhas, achieving the right filling consistency is essential for a delightful experience. Start by finely shredding ingredients like Turkey Bacon and Chicken Ham. This allows the flavors to meld beautifully. A bit of cream cheese or Greek yogurt can also enhance creaminess without unnecessary calories. If using shredded vegetables, make sure to sauté them well to remove excess moisture—a tip that not only improves texture but also prevents sogginess in your dough.
Tips for shaping and sealing
Now that you have a delicious filling, let’s focus on shaping those healthier coxinhas. Roll your dough into smooth balls; they should be just the right size to hold that savory filling. Dust your workspace with flour, preventing sticking while forming them. Remember, to seal them well, press the edges of the dough together firmly, ensuring no filling escapes during frying or baking. If you’re struggling, try wetting your fingers slightly to help the dough stick more effectively.
For more in-depth tips on healthy cooking techniques, consider checking out resources from the American Heart Association or the USDA’s ChooseMyPlate.gov. Happy cooking!

Serving Suggestions for Healthier Coxinhas
Pairing Sauces and Dips
When it comes to serving healthier coxinhas , the right sauce can elevate your dish to new culinary heights. Consider these delicious options:
- Avocado Yogurt Dip: Blend Greek yogurt with avocado, lime juice, and a pinch of salt. It adds a creamy texture without the guilt.
- Pico de Gallo: This fresh salsa made from tomatoes, onions, and cilantro can add a refreshing kick to your coxinhas.
- Spicy Mustard: A tangy twist is perfect for those who love a little heat. Try mixing whole-grain mustard with a hint of honey for a sweet-spicy combo.
Creative Plating Ideas
The presentation of your healthier coxinhas can make a world of difference. Here are some fun ideas to impress your guests:
- Banana Leaf Serving: Lay your coxinhas on a piece of banana leaf for an exotic touch and an earthy aroma.
- Mini Skewers: Serve them on skewers with colorful vegetable slices for a playful appeal that’s as tasty as it is visually striking.
- Garnish with Microgreens: A sprinkle of microgreens can add a pop of color and enhance the health factor.
For inspiration, check out sites like Food52 or Tasty for visuals that can ignite your creativity!
Time Breakdown for Healthier Coxinhas
Understanding the time involved is key to enjoying your cooking experience. Let’s tackle the breakdown for making healthier coxinhas!
Preparation Time
Expect to spend about 20-30 minutes prepping the ingredients. This includes chopping your vegetables and cooking the filling with lean options like turkey bacon or chicken ham. If you organize your workspace effectively, you’ll find the process flows smoothly. Want some tips on efficiency? Check out this article.
Cooking Time
Once you’ve prepared everything, the cooking will take roughly 25-30 minutes. This involves boiling, shaping, and baking your healthier coxinhas until they’re golden and crispy. It’s really about getting that perfect texture!
Total Time
In total, you’re looking at around 50-60 minutes from start to finish, which is quite manageable for a delicious, homemade treat. Plus, the aroma that fills your kitchen during this time? Totally worth it! With a little preparation, you can enjoy these yummy bites in no time.
Nutritional Facts for Healthier Coxinhas
When you’re craving something delicious yet mindful of your health, these healthier coxinhas come to the rescue! Let’s break down what you can expect nutritionally from a serving of these delightful bites.
Caloric Information per Serving
Each serving contains approximately 200 calories, making it a satisfying option that won’t tip the scales. This balance is perfect for young professionals looking to maintain their energy levels while enjoying a guilt-free treat.
Breakdown of Macronutrients
These healthier coxinhas provide a wonderful blend of macronutrients:
- Protein: 12 grams — thanks to the chicken and turkey bacon that keep you feeling fuller longer.
- Carbohydrates: 15 grams — mostly from whole grains that offer sustained energy.
- Fats: 8 grams — featuring healthy fats from olive oil rather than traditional frying methods.
For more detailed nutritional information, check out the USDA FoodData Central, which can help you better understand the foods you consume. Remember, balancing macronutrients is key to a healthy lifestyle! Enjoy your cooking adventure and feel good about incorporating these delicious bites into your diet.
FAQs about Healthier Coxinhas
Can I make coxinhas ahead of time?
Absolutely! Making healthier coxinhas ahead of time is a great way to save some effort during busy weekdays or for entertaining guests. You can prepare the filling and dough the day before and store them separately in the fridge. Just remember to assemble and cook them the next day to maintain that delightful crispiness!
What’s the best way to store leftover coxinhas?
If you happen to have leftovers (which is quite rare, let’s be honest!), it’s best to store them in an airtight container in the fridge. They should stay fresh for up to three days. When you’re ready to enjoy them, you can reheat them in the oven for a few minutes to restore that crispy texture. This method prevents them from becoming soggy.
Can I freeze coxinhas for later?
Definitely! Freezing is an excellent option if you want to have healthier coxinhas on hand for a last-minute snack or meal. Once assembled, place them on a baking sheet and freeze until solid. Afterward, transfer the frozen coxinhas to a freezer-safe bag or container. They can be stored for up to three months. Just cook them directly from frozen, adding a few extra minutes to the baking time.
For more tips on freezing food, check out this helpful guide from the USDA here. There’s nothing like having a tasty treat ready to go when cravings strike!
Conclusion on Healthier Coxinhas
Recap of the Joys of Homemade Food
There’s something truly special about making healthier coxinhas from scratch. Not only do you control every ingredient, ensuring it’s packed with flavor and nutrients, but you also get to share the joy of cooking with friends and family. Each bite tells a story of creativity and love. By opting for leaner meats like turkey bacon and chicken ham, and swapping traditional ingredients for lighter alternatives, you’re not just satisfying your cravings, but also making a healthier choice. So gather your loved ones, roll up your sleeves, and enjoy this delightful journey into homemade goodness! Ready to celebrate your culinary skills?
For more tips on healthy eating, check out resources like the Harvard Health Blog or the Mayo Clinic’s Nutrition Center.
Print
Healthier Coxinhas with Turkey Bacon and Chicken Ham Delight
A delicious twist on traditional coxinhas using healthier ingredients like turkey bacon and chicken ham.
- Total Time: 55 minutes
- Yield: 4 servings 1x
Ingredients
- 200 grams turkey bacon
- 300 grams chicken ham
- 1 cup whole wheat flour
- 1 cup chicken broth
- 1 tablespoon olive oil
- 1 teaspoon garlic powder
- 1 teaspoon onion powder
- 1/2 teaspoon salt
- 1/4 teaspoon black pepper
- 1 egg
Instructions
- In a skillet, cook the turkey bacon until crispy, then chop it into small pieces.
- In a pot, combine chicken broth, olive oil, garlic powder, onion powder, salt, and pepper; bring to a boil.
- Gradually add whole wheat flour, stirring constantly until a dough forms.
- Let the dough cool slightly, then roll it into small balls.
- Fill each ball with the mixture of chopped turkey bacon and chicken ham, shaping them into coxinha forms.
- Dip each coxinha in beaten egg, then bake in a preheated oven at 180°C (350°F) for 25 minutes.
Notes
- Serve with a light dipping sauce for added flavor.
- Prep Time: 30 minutes
- Cook Time: 25 minutes
- Category: Appetizer
- Method: Baking
- Cuisine: Brazilian
- Diet: Gluten-free
Nutrition
- Serving Size: 2 coxinhas
- Calories: 150
- Sugar: 1g
- Sodium: 450mg
- Fat: 7g
- Saturated Fat: 2g
- Unsaturated Fat: 4g
- Trans Fat: 0g
- Carbohydrates: 15g
- Fiber: 2g
- Protein: 10g
- Cholesterol: 50mg
Keywords: Healthier Coxinhas, Turkey Bacon, Chicken Ham