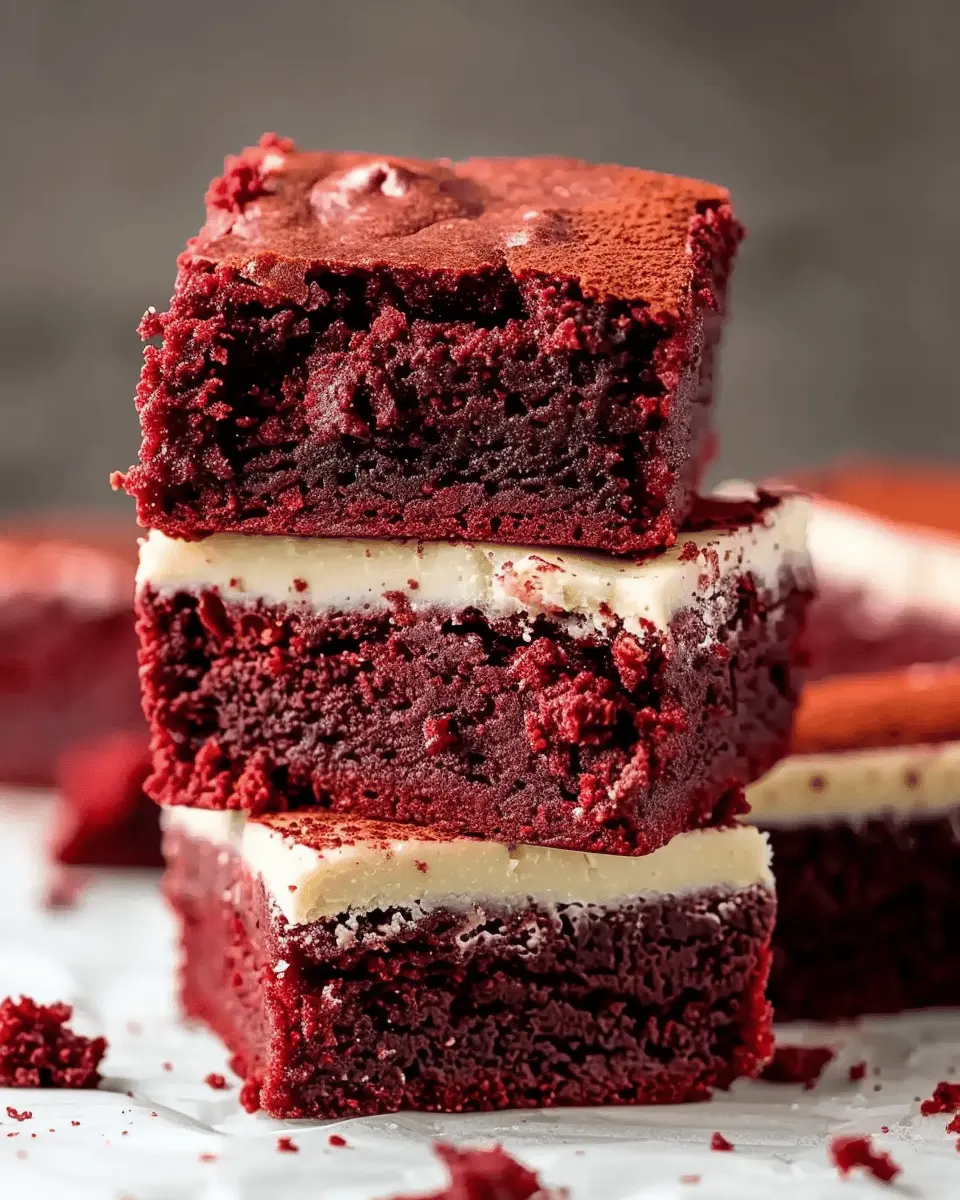
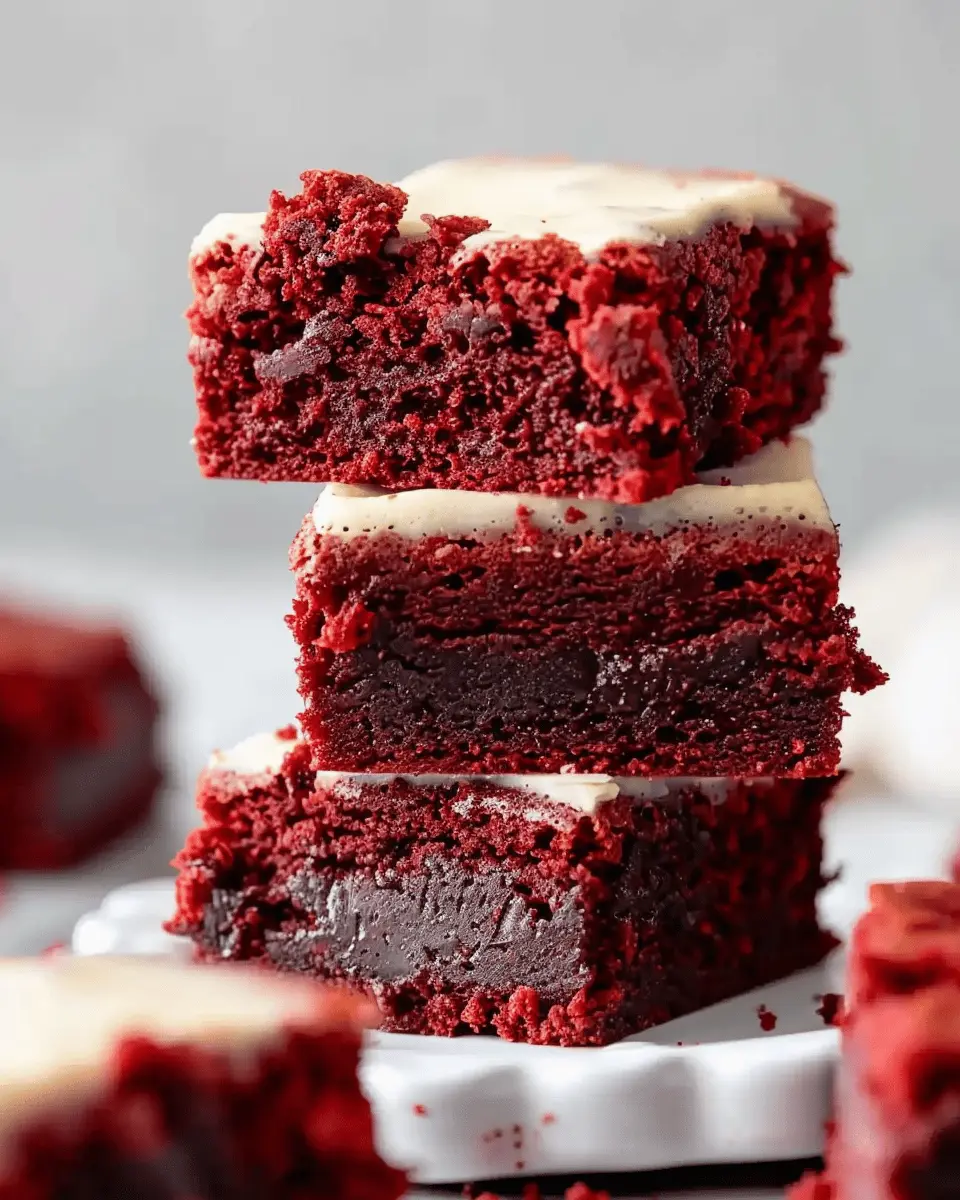
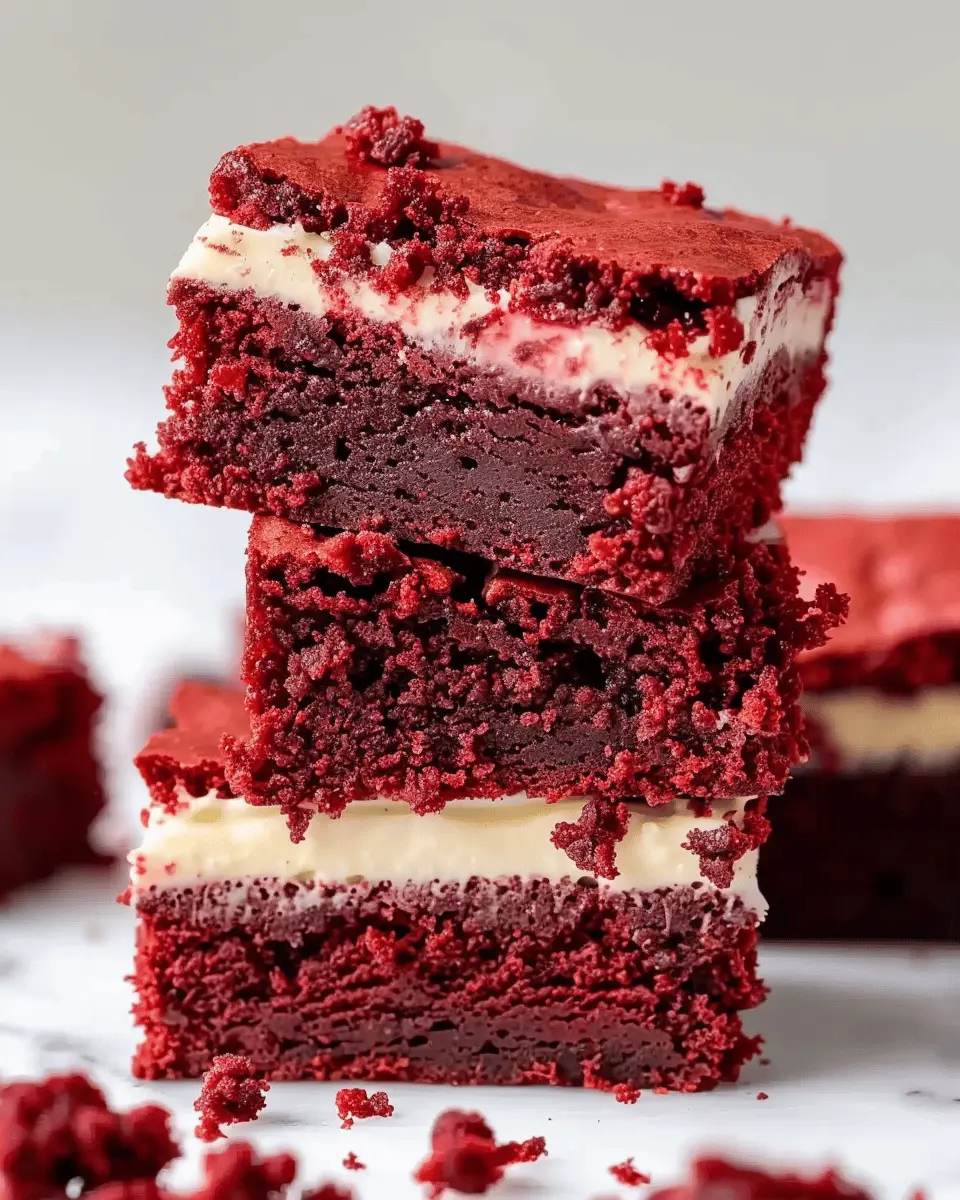
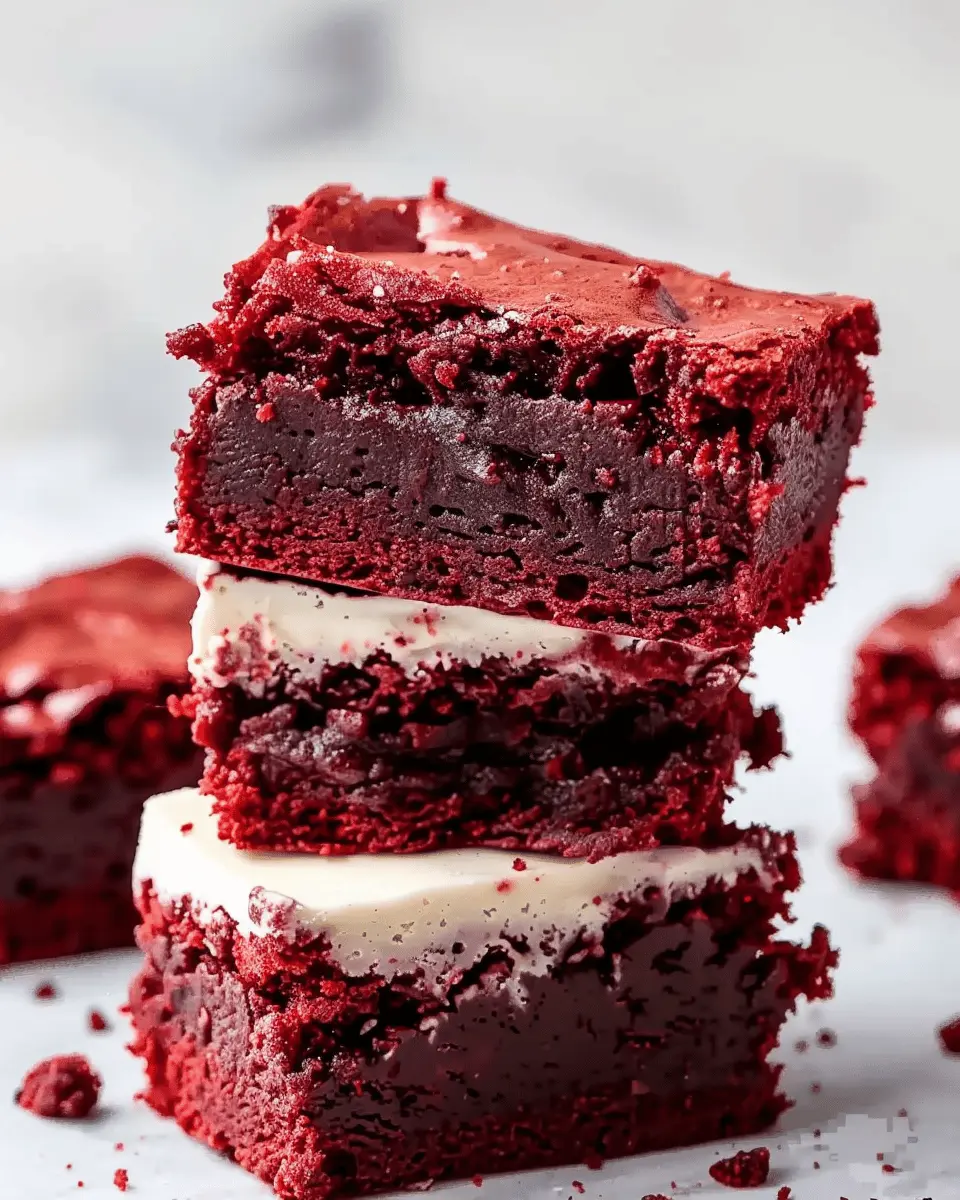
Introduction to Red Velvet Brownies
Have you ever found yourself torn between choosing a dense brownie and a light, fluffy cake? Well, I have the perfect solution for you: red velvet brownies! This delightful treat takes the best elements of both desserts and combines them into a rich, velvety experience that you simply can’t resist. The moment you bite into one, you’ll discover a dense, fudgy texture that’s beautifully complemented by the signature cocoa flavor. It’s a glorious blend that makes every bite a sheer delight.
What Makes Red Velvet Brownies a Must-Try Dessert?
So, why should you give red velvet brownies a whirl? Let’s break it down:
-
Visual Appeal: The eye-catching red hue of these brownies adds a vibrant touch to any dessert table. They’re a feast for the eyes as much as for the palate! Plus, they make a fantastic conversation starter at gatherings.
-
Unique Flavor Profile: These brownies come with the delightful flavors of chocolate and slight tanginess from buttermilk or cream cheese frosting, setting them apart from standard brownies. It’s this unique combination that will leave your taste buds dancing.
-
Versatility: Whether you’re hosting a dinner party or just craving something sweet, red velvet brownies can effortlessly fit the occasion. Pair them with a scoop of vanilla ice cream, or serve them warm with a drizzle of cream cheese icing for an extra special touch.
-
Perfect for Any Skill Level: Whether you’re an experienced baker or a kitchen newbie, you’ll find that making red velvet brownies is straightforward and fun. It’s a recipe that encourages experimentation, right down to the toppings.
In a world filled with countless dessert options, these brownies stand out not only for their jaw-dropping appearance but also for their deliciously rich taste. If you’re craving something a little different this weekend, why not whip up a batch?
For more inspiration on dessert pairings or baking tips, check out Bakerpedia for expert advice. And don’t forget to share your own brownie stories in the comments! Your baking journey is just beginning, and I can’t wait to hear all about it.
Ingredients for Red Velvet Brownies
Making red velvet brownies is all about combining the right ingredients for that perfect balance of flavor and texture. Below, you’ll find everything you need to whip up these delightful goodies in no time!
Essential Ingredients
- Butter: ½ cup of unsalted butter for that rich taste.
- Granulated Sugar: 1 cup to add sweetness and moisture.
- Brown Sugar: ½ cup, giving a deeper flavor and extra chewiness.
- Eggs: 2 large eggs, which help bind and enrich our brownies.
- Vanilla Extract: 1 teaspoon for an aromatic touch.
- All-Purpose Flour: 1 cup to create that perfect base.
- Cocoa Powder: ¼ cup, it’s not red velvet without this key element!
- Red Food Coloring: 1 to 2 tablespoons to achieve that signature hue.
- Baking Powder: ½ teaspoon for the right lift.
- Salt: A pinch to enhance all the flavors.
Ready to dive into baking? With these ingredients, you’ll create red velvet brownies that are sure to impress friends and family alike! For more tips on sweet treats, be sure to check out Taste of Home for delicious ideas.
Preparing Red Velvet Brownies
Are you ready to dive into the delicious world of red velvet brownies? These indulgent treats combine the rich flavors of traditional red velvet cake with the chewy texture of brownies, and they’re surprisingly simple to make! Let’s walk through the preparation step by step.
Gather Your Ingredients
First things first: make sure to have all your ingredients in hand before you start baking. This not only makes the process smoother but also ensures you won’t find yourself mid-recipe and missing a crucial component. For red velvet brownies, you’ll need:
- ½ cup unsalted butter (melted)
- 1 cup white sugar
- ½ cup brown sugar (packed)
- 2 large eggs
- 1 teaspoon vanilla extract
- 1 cup all-purpose flour
- ⅓ cup cocoa powder (unsweetened)
- ½ teaspoon baking powder
- ¼ teaspoon salt
- 1 tablespoon red food coloring (this is what gives that signature hue!)
- Optional: white chocolate chips or nuts for added texture
Now that you’ve assembled your ingredients, let’s get cooking!
Melt the Butter and Mix Sugars
Start by melting your unsalted butter in a small saucepan over low heat or in the microwave. Once melted, transfer it to a mixing bowl and stir in both the white sugar and brown sugar. The combination of sugars will create a wonderfully rich sweetness. Mix until the sugars are well combined and the mixture is slightly glossy.
Combine the Wet Ingredients
Once your sugars are blended with the butter, it’s time to add the next players in our red velvet brownie ensemble: the eggs and vanilla extract. Crack the eggs in one at a time, beating well after each addition to aerate the mixture. Pour in the vanilla extract, and give everything a good stir until it’s smooth and well combined. This step helps build a nice base for your brownies.
Mix in the Cocoa and Color
Now comes the fun part—the cocoa powder and the vibrant red food coloring! Sift the cocoa powder directly into your wet mixture to avoid any lumps. Gently fold it in until fully combined; this will bring out that rich chocolate flavor. After that, add the red food coloring. Depending on how bold you want your brownies to be, you can adjust the amount. Just remember, a little goes a long way!
Incorporate the Dry Ingredients
Next, it’s time to bring together the dry ingredients that will give your red velvet brownies their structure. In a separate bowl, whisk together the all-purpose flour, baking powder, and salt. Gradually add this dry mixture to the wet ingredients, folding gently as you go. It’s important not to overmix at this stage; just enough to combine everything will do. If you’re feeling adventurous, toss in some white chocolate chips or chopped nuts here for an extra twist!
Bake to Perfection
Preheat your oven to 350°F (175°C) and grease a baking pan. Pour the brownie batter into the prepared pan, smoothing out the top for an even bake. Pop it in the oven and let it bake for about 20-25 minutes. You’ll know they’re done when a toothpick inserted into the center comes out with a few moist crumbs—don’t worry, they shouldn’t be completely clean since we’re aiming for fudgy brownies!
Once out of the oven, allow your red velvet brownies to cool in the pan for a bit before transferring them to a wire rack. Cutting them into squares is the last step. Serve them warm with a scoop of vanilla ice cream, and watch your friends and family fall in love!
For more tips on perfecting your baking technique, check out resources from reputable baking blogs or cookbooks. Happy baking!
Variations on Red Velvet Brownies
If you’re ready to elevate your red velvet brownies game, you’re in for a treat! There are endless possibilities to customize this beloved dessert to suit your taste or dietary preferences.
Red Velvet Brownies with Cream Cheese Frosting
One of the most decadent ways to enjoy your red velvet brownies is with a luscious cream cheese frosting on top. This tangy frosting perfectly complements the rich chocolate flavor and adds a creamy texture that makes each bite irresistible. To whip up this frosting:
- 8 oz cream cheese, softened
- 1/2 cup unsalted butter, softened
- 2-3 cups powdered sugar
- 1 tsp vanilla extract
Simply beat the cream cheese and butter until smooth, gradually adding powdered sugar and vanilla. Spread generously over your cooled brownies for a show-stopping treat!
Gluten-Free Red Velvet Brownies
For those with gluten sensitivities, don’t worry! You can still indulge in red velvet brownies. Just replace all-purpose flour with a gluten-free blend, such as almond flour or oat flour. Many people are surprised at how good gluten-free baking can be; it offers a unique texture and flavor profile that’s just as satisfying. Be sure to check resources like Gluten-Free Living for tips on baking without gluten!
Red Velvet Brownie Parfaits
Another fun twist is to create red velvet brownie parfaits. Layer crumbled brownies with whipped cream and your favorite toppings, such as berries or chocolate sauce, in a clear glass. This not only looks beautiful but also adds an exciting texture contrast. Perfect for a dinner party or a weekend treat!
Let your imagination run wild with these variations and enjoy the delightful world of red velvet brownies!
Baking Tips and Notes for Red Velvet Brownies
Baking the perfect red velvet brownies is an art, and I’m here to share some valuable insights to elevate your experience.
Use the Right Ingredients
- Always choose high-quality cocoa powder and a good food coloring for that vibrant color and rich taste.
- If possible, opt for Dutch-processed cocoa powder. It gives a more decadent flavor, essential for those red velvet brownies.
Achieving the Perfect Texture
- Keep an eye on the baking time! Overbaking can lead to dry brownies. Check for doneness using the toothpick method; a few moist crumbs should cling to the toothpick.
- For an extra fudgy consistency, consider adding a tablespoon of melted butter or oil to your batter.
Flavor Enhancements
- Add a hint of coffee to the batter to deepen the flavor profile; it wonderfully complements the cocoa.
- For those interested in more flavor combinations, a sprinkle of sea salt before serving can balance the sweetness.
Lastly, don’t forget to let your red velvet brownies cool completely before cutting. This allows for cleaner edges and an overall more appealing dessert! Looking for more inspiration? Check out this detailed guide on brownie baking tips for even more ideas!
Serving suggestions for Red Velvet Brownies
When it comes to enjoying red velvet brownies, presentation and pairing can elevate them from a simple treat to a standout dessert. Here are some delightful serving suggestions to consider:
Pair with Ice Cream
Why not serve your warm brownies with a scoop of vanilla or cream cheese frosting ice cream? The contrast of warm and cold creates a heavenly dessert experience. This combination brings out the rich cocoa flavor while the ice cream adds a luscious creaminess.
Complement with Fresh Berries
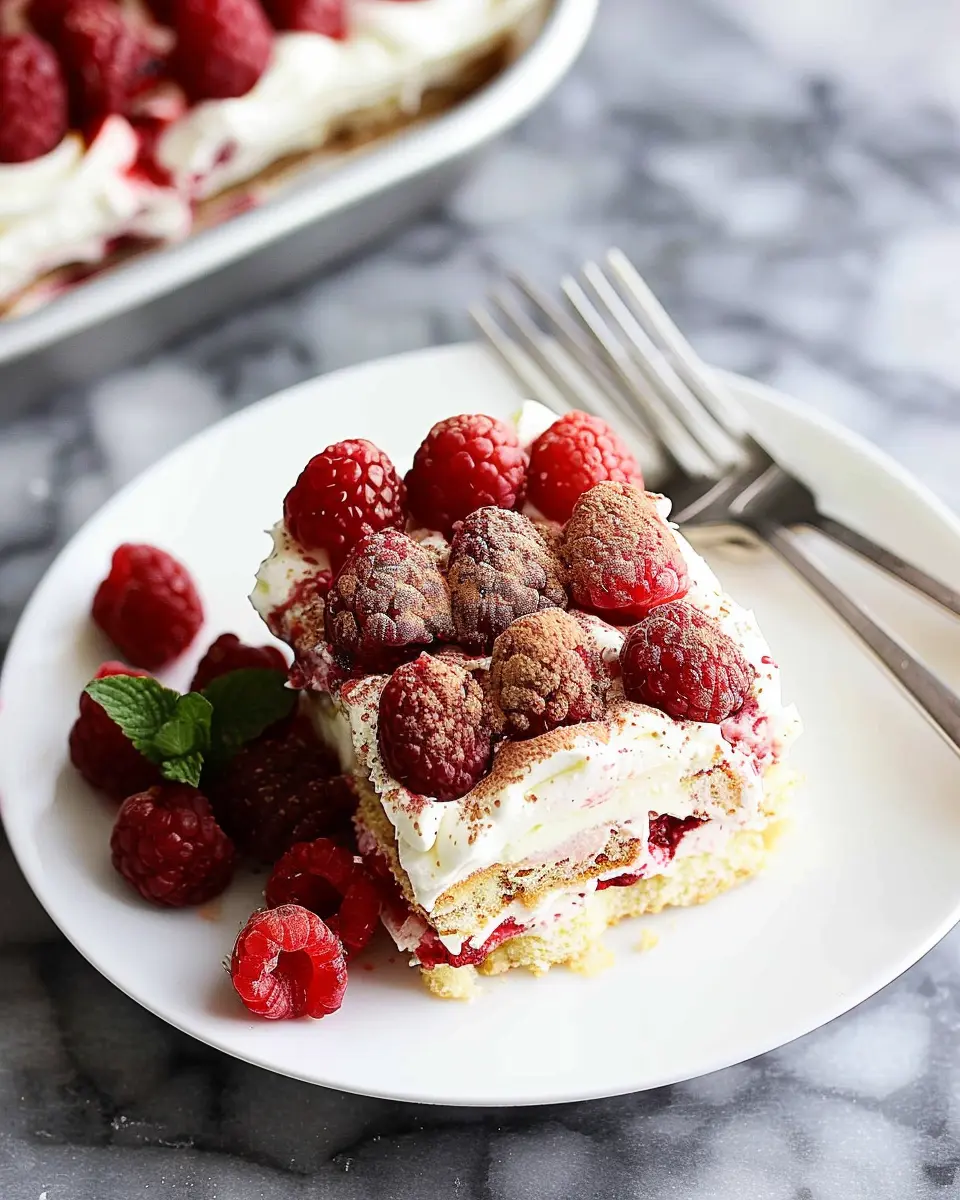
Top your brownies with a handful of fresh raspberries or strawberries for a pop of color and a tangy finish that balances the sweetness. The berries’ natural acidity plays beautifully with the red velvet flavor.
Drizzle with Cream Cheese Glaze
A drizzle of cream cheese glaze can take your brownies to the next level. Just mix powdered sugar, cream cheese, and a splash of milk for a rich sauce. For a twist, you can add a hint of vanilla or lemon zest to brighten the flavors.
Serving on a Festive Platter
Presenting your red velvet brownies on a colorful, festive platter not only looks inviting but also encourages sharing at parties or gatherings. Whether it’s a cozy get-together or a larger celebration, bold visuals make a lasting impression.
For more inspiration on pairing desserts and creating a perfect dining atmosphere, check out Epicurious for additional concept ideas. Happy baking!
Tips for Achieving Perfect Red Velvet Brownies
When it comes to making red velvet brownies, a few small tips can elevate your baking game and help you achieve that perfectly decadent treat everyone will love. Here’s how you can ensure your brownies come out irresistibly delicious.
Use Quality Ingredients
Start with fresh, high-quality ingredients. The chocolate should be good, and using unsweetened cocoa powder can bring out a richer flavor. Don’t skimp on the red food coloring either; a vibrant hue makes a visual impact that enhances the overall experience.
Avoid Overmixing
When combining your ingredients, mix just until the batter is smooth. Overmixing can lead to dense brownies, which is a common pitfall for novice bakers. Remember, a few lumps are okay! A light touch will give you that fudgy texture you desire.
Baking Time is Key
Every oven is different, so keep an eye on your brownies as they bake. To test for doneness, insert a toothpick into the center; it should come out with a few moist crumbs but not wet batter. Aim for that sweet spot to ensure perfect texture.
Let Them Cool
Patience is a virtue! Let your red velvet brownies cool in the pan before cutting them. This helps them set properly and makes for cleaner cuts. Plus, the flavors meld together beautifully during this time.
For more baking insights, sites like Serious Eats offer great tips that can help enhance your baking skills! Whether you’re a beginner or a seasoned baker, these pointers will guide you towards achieving that ultimate chewy, fudgy brownie bliss.
Time details for Red Velvet Brownies
Preparation time
Getting your ingredients ready for these red velvet brownies is quick and easy! You’ll need about 20 minutes to gather everything, mix your batter, and get it into the pan.
Baking time
The baking magic happens in approximately 25-30 minutes. Keep an eye on them; you’re looking for a slightly firm top but a gooey center. The perfect brownie balance!
Total time
In total, you’re looking at around 50-60 minutes from start to finish. In no time, you’ll have a delicious batch of red velvet brownies to impress your friends, co-workers, or even just yourself on a cozy Netflix night!
Are you ready to dive in? For more tips and inspiration, check out this article for expert baking advice!
Nutritional Information for Red Velvet Brownies
When it comes to indulging in a delectable dessert like red velvet brownies, knowing their nutritional content can help you enjoy them guilt-free. Let’s break down what to expect per brownie:
Calories
A standard brownie typically contains around 200–250 calories. This varies based on the recipe, but it’s a sweet treat you can savor without going overboard.
Sugar Content
Red velvet brownies can pack in about 18–22 grams of sugar each, depending on how sweet you like them. If you’re looking for a reduced-sugar option, consider substituting with alternatives like stevia or monk fruit sweetener.
Fats
These brownies generally contain around 10–15 grams of fat, largely from butter and eggs. If you’re watching your fat intake, a good rule of thumb is to enjoy these occasionally, as they provide a rich, satisfying flavor that makes each bite worth it.
For more insights on dessert-making, check out Healthline’s Guide to Sugar Alternatives, which offers detailed information about reducing sugar in your baking. Understanding the nutritional aspects of your favorite treats can make you appreciate them even more!
FAQs about Red Velvet Brownies
Can I make these brownies ahead of time?
Absolutely! Red velvet brownies are perfect for prepping in advance. Just bake them according to the recipe, let them cool completely, and then store them in an airtight container at room temperature. They can be made up to three days ahead of your event or gathering. If you want to keep them even fresher, consider freezing them. Just slice the brownies first, then wrap each piece tightly in plastic wrap before placing them in a freezer-safe bag.
What’s the best way to store red velvet brownies?
Storing your red velvet brownies properly is key to maintaining their delightful texture. For short-term storage, keep them in an airtight container at room temperature. To enjoy them longer, refrigerate—though this can sometimes alter the texture a bit. If you choose to freeze them, as mentioned, they can stay fresh for several months. Just make sure to thaw them overnight in the fridge before enjoying or pop them in the microwave for a quick warmth!
How do I know when my brownies are done?
Knowing when your red velvet brownies are perfectly baked can be tricky. The classic toothpick test works wonders! Insert a toothpick into the center; if it comes out clean or with just a few moist crumbs, they’re ready to go. Keep in mind that brownies continue to cook a little after being removed from the oven due to residual heat, so it’s better to err on the side of slightly underbaking for that gooey texture everyone loves.
With these tips, you’re well on your way to making the best red velvet brownies. Happy baking! For further insights, check out this guide on baking tips.
Conclusion on Red Velvet Brownies
In wrapping up our adventure with red velvet brownies, it’s clear that this delightful treat is more than just a dessert; it’s a decadent experience that brings excitement to any occasion. Whether you’re baking for a cozy night in or impressing friends at a gathering, these brownies will not only satisfy your sweet tooth but also leave a lasting impression.
Remember to experiment with your toppings; a sprinkle of sea salt or a drizzle of cream cheese frosting can elevate your creation further. Don’t forget to share your results! For more inspirations and tips, check out sources like Food Network or BBC Good Food. Happy baking!
Print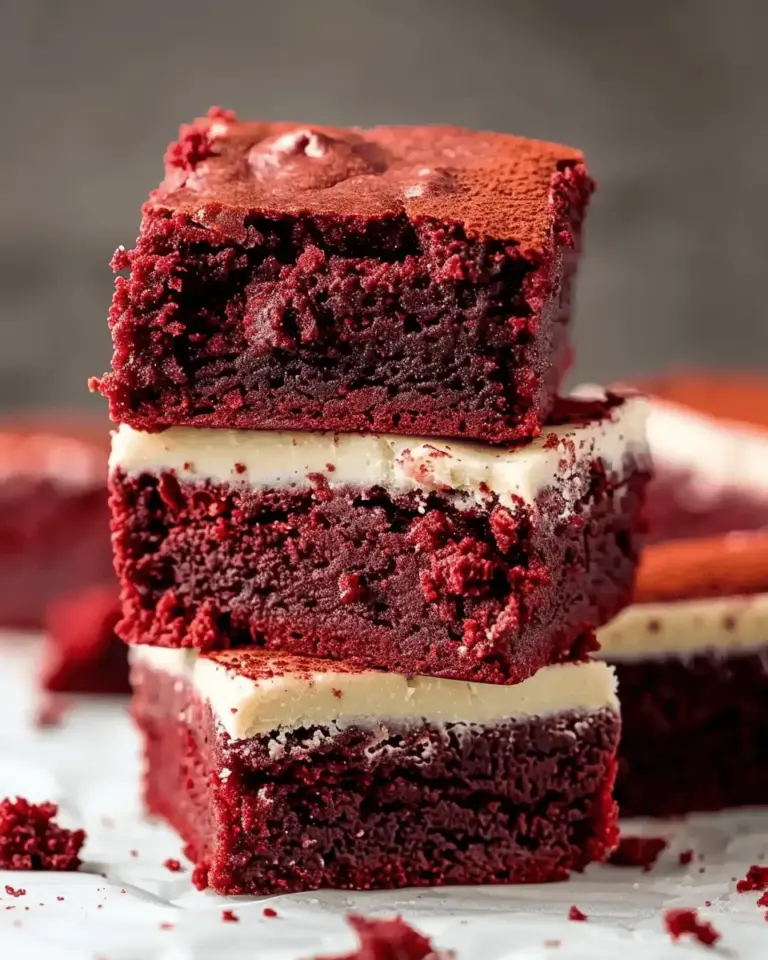
Red Velvet Brownies: Indulgent Treats for Every Occasion
These red velvet brownies are the perfect indulgence for any occasion, combining the rich flavor of chocolate with the vibrant red color of red velvet.
- Total Time: 45 minutes
- Yield: 16 brownies 1x
Ingredients
- 1 cup unsalted butter
- 1 cup granulated sugar
- 2 large eggs
- 1 teaspoon vanilla extract
- 1 tablespoon red food coloring
- 1 cup all-purpose flour
- 1/2 cup unsweetened cocoa powder
- 1/4 teaspoon salt
- 1/2 cup white chocolate chips
Instructions
- Preheat the oven to 350°F (175°C) and grease a baking pan.
- In a bowl, melt the butter and mix in the sugar, eggs, and vanilla until well combined.
- Add the red food coloring and stir until incorporated.
- Sift together the flour, cocoa powder, and salt, then fold into the wet ingredients.
- Lastly, fold in the white chocolate chips.
- Pour the batter into the prepared baking pan and smooth the top.
- Bake for 25-30 minutes or until a toothpick comes out clean.
- Allow to cool before cutting into squares.
Notes
- Serve with a dollop of whipped cream for extra indulgence.
- For a richer flavor, add a teaspoon of espresso powder to the batter.
- Prep Time: 15 minutes
- Cook Time: 30 minutes
- Category: Desserts
- Method: baking
- Cuisine: American
- Diet: vegetarian
Nutrition
- Serving Size: 1 brownie
- Calories: 250
- Sugar: 20g
- Sodium: 200mg
- Fat: 12g
- Saturated Fat: 7g
- Unsaturated Fat: 5g
- Trans Fat: 0g
- Carbohydrates: 34g
- Fiber: 2g
- Protein: 3g
- Cholesterol: 50mg
Keywords: red velvet brownies, dessert, chocolate treats