
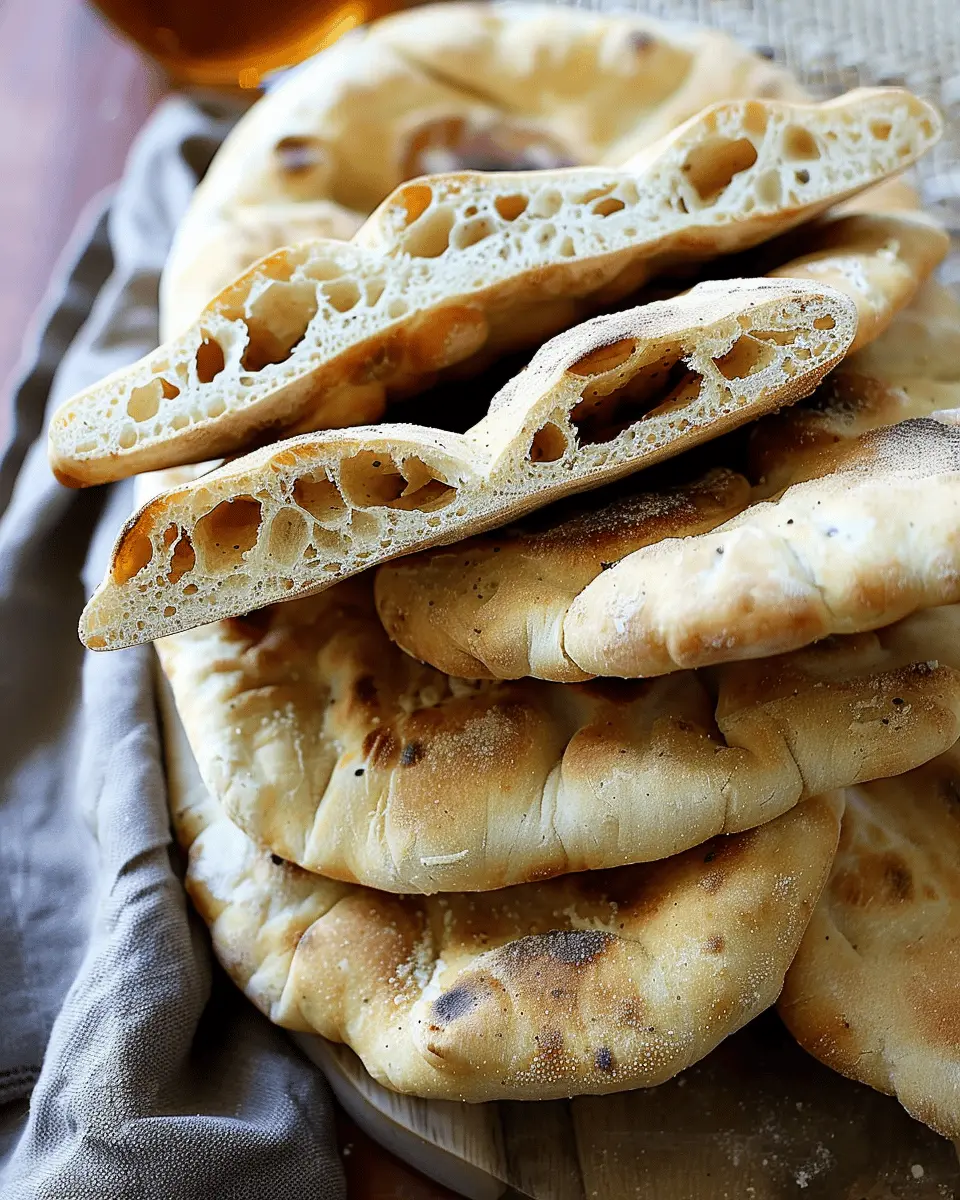
Introduction to Fresh Homemade Pita Bread
Making fresh homemade pita bread is a delightful culinary adventure that can elevate your meals to a whole new level. Not only is it a fun activity to engage in, but it also brings the taste of warm, fluffy pita directly to your plate — something store-bought varieties can rarely match.
Why Make Pita Bread at Home?
You might wonder why you should take the plunge into bread-making when there are plenty of options on the grocery store shelves. Well, let’s dive into a few key reasons:
-
Flavor and Freshness: Homemade pita bread is undeniably fresher.When you make it yourself, it’s warm and soft, and there’s simply nothing better than pulling it out of the oven just as it puffs up. It enhances dishes like wraps and dips, making everything from hummus to grilled veggies that much more enjoyable.
-
Simple Ingredients: With just a few pantry staples—flour, water, yeast, olive oil, and salt—you can create amazing bread without any preservatives or additives. This DIY process can be particularly satisfying, knowing exactly what goes into your food.
-
Customization: When making fresh homemade pita bread, you can play around with flavors and textures. Want to add herbs like rosemary or garlic? Go for it! Looking for a whole wheat version? Absolutely! The possibilities are endless and tailored precisely to your taste.
-
Cost-Effective: Making your own pita can also help save some cash. Store-bought artisan pita can be pricey, while homemade options are cheaper, especially when cooking for a group.
-
Sharing and Enjoyment: Bread-making can be a communal process. Invite some friends over, turn on your favorite playlist, and enjoy the process together. Nothing draws people closer like the warmth of fresh bread!
To learn more about the basics of bread-making, check out King Arthur Baking for excellent tips and techniques.
Whether you’re dipping it into a refreshing tzatziki sauce or filling it with turkey bacon and veggies, fresh homemade pita bread will become a staple in your kitchen. So, roll up your sleeves and get ready to impress your taste buds!
Ingredients for Fresh Homemade Pita Bread
Essential ingredients for perfect pita
Making fresh homemade pita bread is simpler than you might think. The wonderful thing about pita is that it requires just a few essential ingredients that you probably already have in your kitchen.
- All-purpose flour: This is the backbone of your pita. It gives your bread its structure and softness.
- Warm water: About 110°F is ideal to activate the yeast. The warmth ensures your pita rises well.
- Active dry yeast: This will make your pita light and fluffy. If you want to learn more about yeast types, check out this helpful guide.
- Salt: Just a pinch enhances the flavor and strengthens the dough.
- Sugar: A touch of sugar helps to feed the yeast, making it more active and resulting in a better rise.
- Olive oil: This adds moisture and a bit of richness to the flavor.
As with any recipe, the quality of your ingredients can really make a difference. So go for the freshest you can find, and get ready to enjoy the deliciousness of homemade pita!
Step-by-Step Preparation of Fresh Homemade Pita Bread
Making fresh homemade pita bread isn’t just about following a recipe; it’s about engaging with the process and enjoying the delightful aroma and taste that fills your kitchen. Let’s guide you through this simple yet satisfying journey.
Mix the dough
Start with the base of your pita: the dough. Gather the following ingredients:
- 3 cups all-purpose flour
- 1 teaspoon salt
- 1 teaspoon sugar
- 1 tablespoon active dry yeast
- 1 cup warm water (around 110°F)
- 1 tablespoon olive oil
In a mixing bowl, combine the sugar and warm water, then sprinkle the yeast on top. Let it sit for about 5-10 minutes until it becomes frothy. This step ensures that your yeast is active and will later help the dough rise beautifully. Once it’s bubbly, add in the flour and salt, followed by the olive oil.
Bring everything together until a shaggy dough forms. Tip: If you don’t have a stand mixer, you can easily use your hands—just mix until the dough pulls away from the sides of the bowl. Knead the dough for about 8-10 minutes until it’s smooth and elastic.
Prepare your oven
While your dough is resting, preheat your oven to 475°F (245°C). This high temperature is crucial for creating those lovely puffed-up pockets inside your pita. Also, place a baking stone or an upside-down baking sheet inside the oven to heat up. If you need more helpful tips on baking bread, check out this detailed guide on Yeast Breads.
Portion the dough
Once your dough has risen for about an hour (or until it has doubled in size), it’s time to portion it. Gently punch down the dough to release the air, then transfer it to a lightly floured surface. Divide the dough into eight equal pieces (or more if you prefer smaller pitas). Roll each piece into a ball and cover them with a damp cloth to keep them from drying out while you work.
Roll out each ball
Now comes the fun part—rolling! Take one ball of dough at a time and flatten it gently with your fingers. Then, using a rolling pin, roll it out into a circle about 1/4 inch thick. The goal is to create an even thickness, so your fresh homemade pita bread puffs nicely in the oven. Dust your work surface with a little flour as needed to prevent sticking.
Challenge yourself to make them as uniform as possible; however, a little imperfection adds character! If you find that your dough springs back while rolling, let it rest for a few minutes before trying again.
Bake the pita
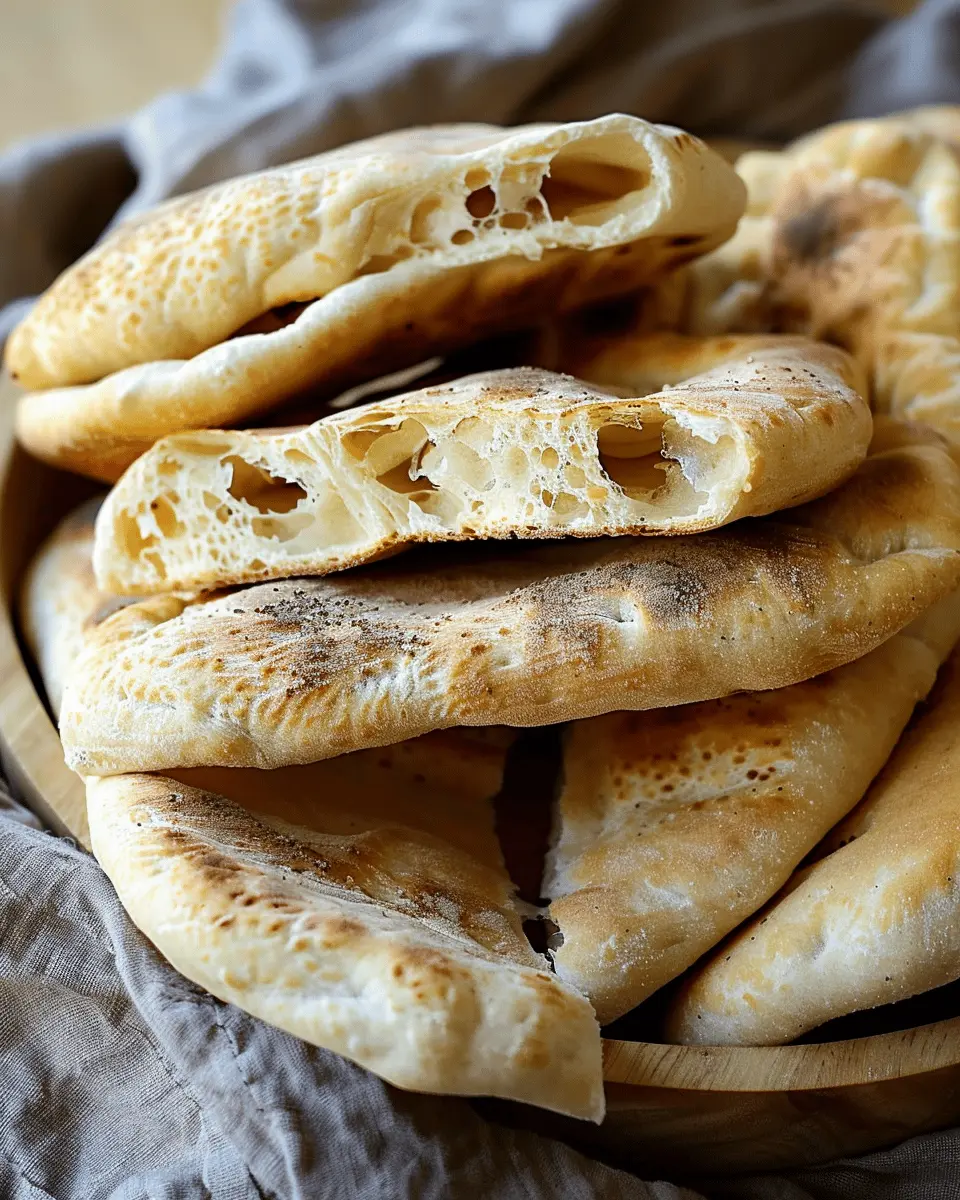
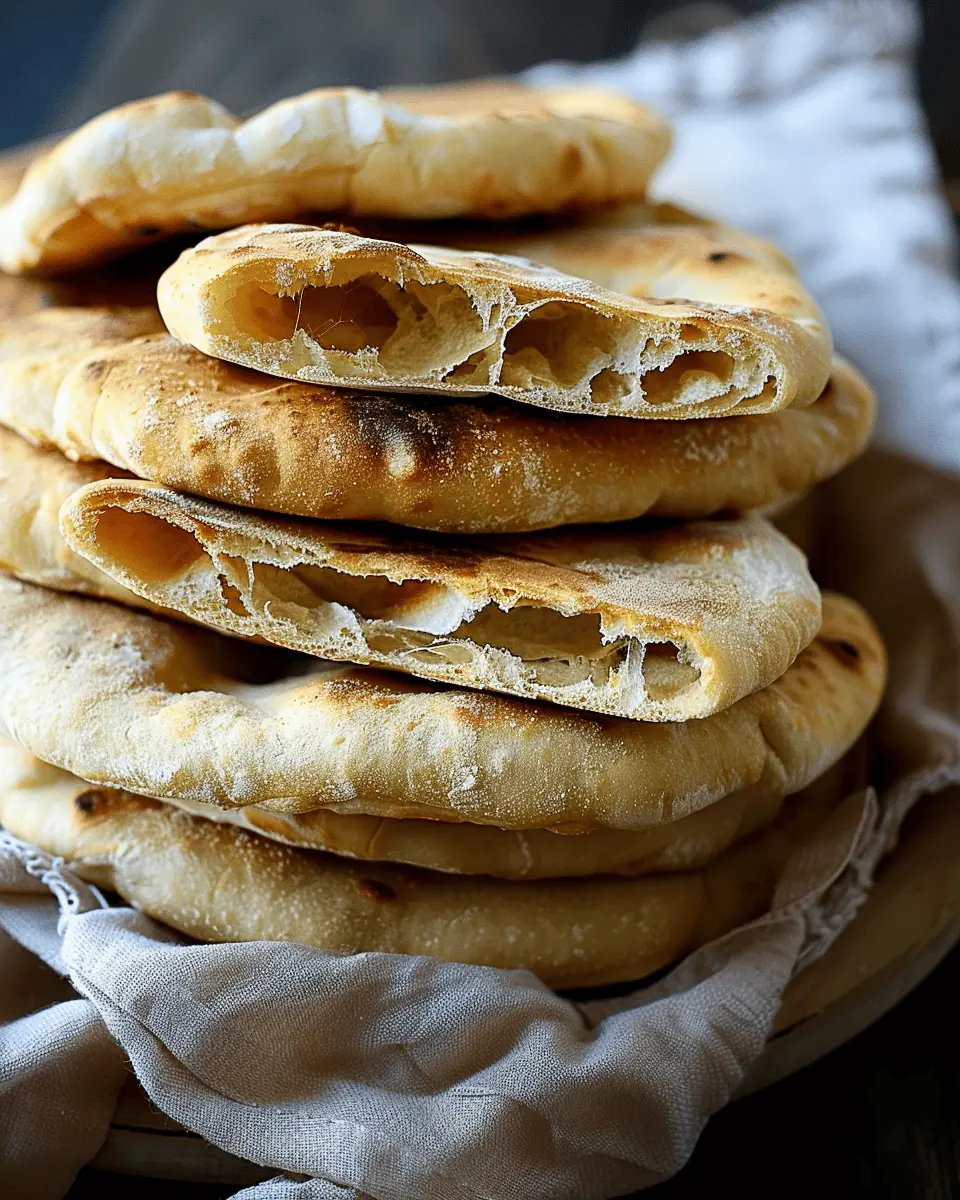
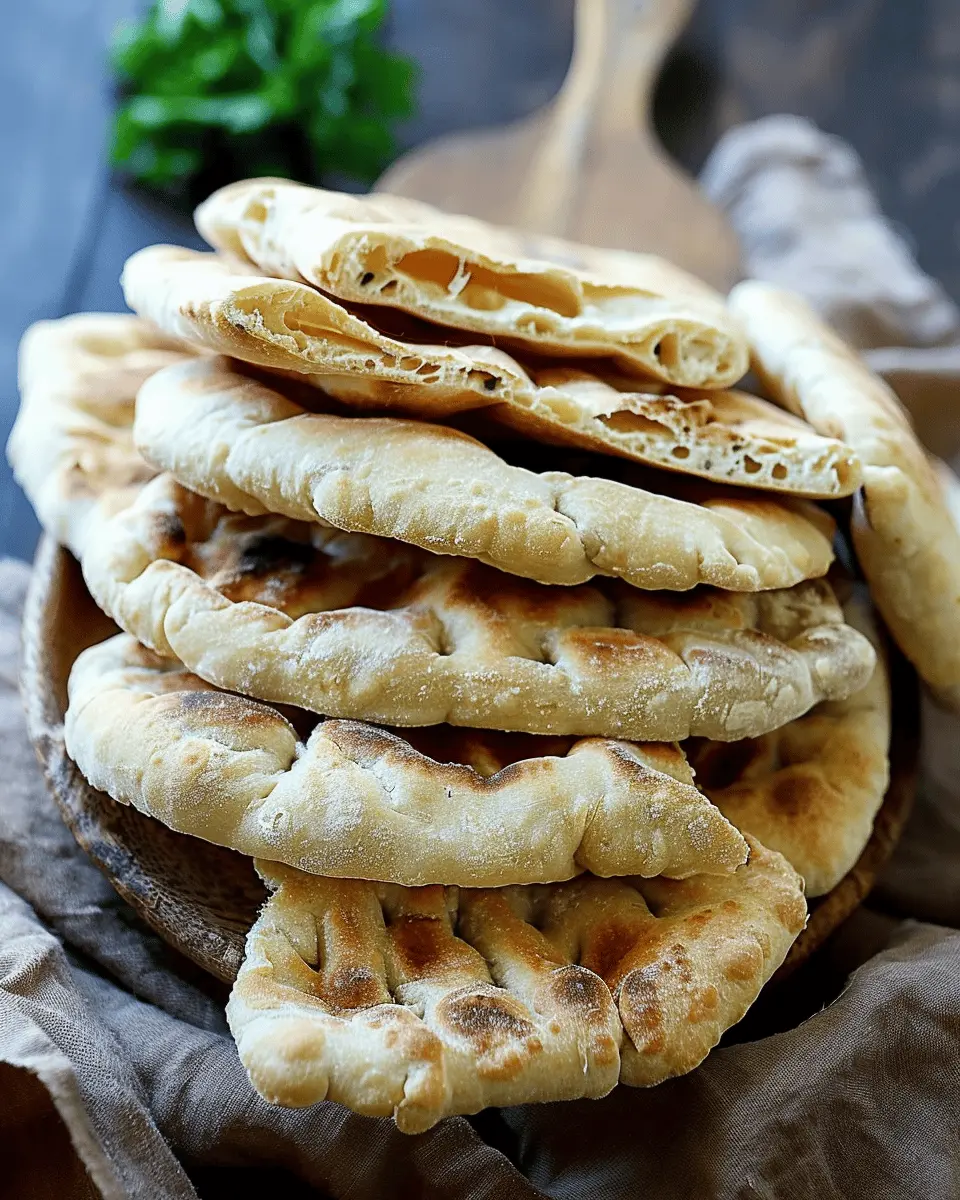
Now it’s time to bake your pitas! Carefully place the rolled dough onto your preheated baking stone or sheet, ensuring they aren’t overlapping. Bake for about 3-5 minutes or until they start to puff and develop slight brown spots. Keep an eye on them; you want them puffy and soft, not hard.
Once baked, remove your pitas from the oven and cover them with a clean kitchen towel to keep them warm and soft. If you’re making a larger batch, it’s advisable to store them in an airtight container after cooling to preserve their freshness.
Wrap Up
And there you have it—a simple, rewarding process for preparing fresh homemade pita bread! Enjoy these delicious pockets with your favorite dips, stuff them with savory fillings like turkey bacon or chicken ham, or just savor them fresh from the oven. The secret to perfect pita lies in the details, so don’t rush; enjoy the experience!
Variations on Fresh Homemade Pita Bread
Fresh homemade pita bread is incredibly versatile, and its variations can take your meals to a whole new level. Let’s explore two delightful options you can easily try in your own kitchen.
Whole Wheat Pita
For a healthier twist, consider making whole wheat pita bread. This version retains all the fantastic qualities of traditional pita but incorporates whole grain flour, adding extra fiber and nutrients. To create this, simply substitute half or all of the all-purpose flour in your original recipe with whole wheat flour.
- Pro Tip: You may need to slightly increase the hydration level (water) as whole wheat flour absorbs more moisture. A great source for whole grain options is Whole Grains Council.
This whole wheat variation not only gives your pita a nuttier flavor, but it also pairs perfectly with dips like hummus or tzatziki.
Flavored Pita Bread
Why not infuse your fresh homemade pita bread with exciting flavors? Try adding ingredients like herbs, spices, or even cheese.
- Roasted Garlic: Incorporate roasted garlic into the dough for a savory twist that complements many dishes.
- Herbs de Provence: Mix in a blend of dried herbs to create an aromatic pita that’s great for sandwiches.
- Cheese: Adding shredded cheese, such as feta or cheddar, can turn your pita into a delightful side dish.
The options are endless! By experimenting with different flavors, you can create custom pitas that suit your individual taste. For an extra flavoring boost, check out America’s Test Kitchen for more inspiration.
Baking your variations right at home not only allows flexibility in flavors but also enhances the joy of sharing delicious meals with family and friends. Which flavor combo will you try first?
Cooking Tips and Notes for Fresh Homemade Pita Bread
Common Mistakes to Avoid
When making fresh homemade pita bread, there are a few pitfalls worth noting. Using too much flour can lead to a dry dough that won’t rise properly. Remember, a slightly sticky dough is ideal! Additionally, ensure your yeast is active—old yeast can ruin the leavening process. For the best results, always measure accurately and store your yeast properly.
Troubleshooting Your Dough
Even the most seasoned bakers encounter issues occasionally. If your dough isn’t rising, it might be due to temperature—yeast thrives in warmth. A great tip is to let your dough rest in a warm, draft-free spot, like an oven that’s off but slightly warm. Alternatively, if your pita bread doesn’t puff up while baking, consider rolling it out a bit thicker next time.
For more insights on baking techniques, check out this helpful guide on dough science. Embrace the process, and soon you’ll master the art of fresh homemade pita bread!
Serving Suggestions for Fresh Homemade Pita Bread
Pairing Pita with Dips and Spreads
There’s something truly delightful about enjoying fresh homemade pita bread with a variety of dips. Think creamy hummus, tangy tzatziki, or a zesty roasted red pepper spread. Not only do these options enhance the flavors of your pita, but they also add nutritional benefits. Hummus, for instance, is high in protein and fiber, making it a fantastic snack choice. Want to try something different? A garden-fresh guacamole can be a refreshing twist, especially for summer gatherings. For a list of delicious dip recipes, check out sites like Minimalist Baker.
Meal Ideas Using Pita Bread
The versatility of fresh homemade pita bread means you can create quick meals in no time! Here are a few ideas:
- Pita Sandwiches: Stuff your pita with turkey bacon, lettuce, tomatoes, and a drizzle of ranch dressing for a satisfying lunch.
- Mediterranean Wraps: Fill your pita with chicken ham, feta, olives, and spinach for a savory treat.
- Pita Pizzas: Top with tomato sauce, mozzarella, and your choice of veggies or meats, then bake for a delicious twist on pizza night.
By incorporating these serving suggestions, you’ll quickly find that fresh homemade pita bread can elevate any meal!
Time Breakdown for Fresh Homemade Pita Bread
Preparation time
Getting started on your fresh homemade pita bread is a breeze! You’ll need about 15 minutes to gather your ingredients and mix the dough. A smooth, well-prepared dough sets the stage for delicious pita!
Rising time
Next, it’s time for the dough to rise. You should let it sit and develop flavor for about 1 hour. This is a perfect moment to catch up on a favorite show or read a few pages of that book you’ve been meaning to get to. Patience is key!
Baking time
Once the dough has risen, baking it takes approximately 10 minutes. Keep an eye on those pitas while they puff up; it’s like watching magic happen right in your kitchen!
Total time
In total, you’re looking at around 1 hour and 25 minutes from start to finish. Not too shabby for such delightful homemade pitas! This time includes rising and baking time, making it a lovely addition to any meal.
Discovering the joy of creating your own fresh homemade pita bread is well worth it. Ready to roll? Check out this guide on bread making for more tips and tricks!
Nutritional Facts for Fresh Homemade Pita Bread
When you whip up a batch of fresh homemade pita bread, it’s not only a delicious addition to your meals but also a healthy option.
Calories per serving
Each serving of a standard-sized pita (about 60 grams) contains roughly 170 calories. This makes it a great base for your favorite fillings and dips without breaking your calorie bank.
Key nutrients
This delightful bread is packed with essential nutrients:
- Protein: Around 6 grams per serving helps support muscle growth and repair.
- Fiber: Offers about 2 grams, promoting digestive health.
- B Vitamins: Vital for energy metabolism and brain health.
For further reading on the nutrient benefits of whole grains, check out resources from the Whole Grains Council. Enjoy exploring the tasty and healthy world of fresh homemade pita bread!
FAQs about Fresh Homemade Pita Bread
Can I freeze homemade pita bread?
Absolutely! Freezing fresh homemade pita bread is a fantastic way to preserve its deliciousness for later use. To do this, allow the pita bread to cool completely after baking. Then, wrap each pita tightly in plastic wrap or aluminum foil, and place them in a freezer-safe bag. When stored properly, they can last up to three months. When you’re ready to enjoy them, simply thaw them at room temperature or reheat them directly from the freezer.
How do I reheat pita bread?
Reheating fresh homemade pita bread is simple and restores that just-baked texture. Here are a couple of methods you can try:
- Oven: Preheat your oven to 350°F (175°C). Wrap your pitas in foil and warm them for about 10 minutes.
- Stovetop: Heat a dry skillet over medium heat. Place the pita in the skillet for about 30 seconds on each side for a delightful softness.
Can I use whole wheat flour?
Definitely! Using whole wheat flour is a fantastic choice for making fresh homemade pita bread. It enhances the bread’s nutritional value, adding fiber and a nutty flavor. Just keep in mind that whole wheat flour will make your pita slightly denser compared to all-purpose flour. You can also mix the two for a balanced texture if you prefer.
Whether you’re using your pitas for sandwiches, dips, or just enjoying them on their own, making them at home is well worth the effort. If you’re interested in more cooking tips, check out resources like Serious Eats for more in-depth guides!
Conclusion on Fresh Homemade Pita Bread
In conclusion, making fresh homemade pita bread is an incredibly satisfying experience that can elevate your meals. Not only is it simple to prepare, but it also opens up a world of culinary possibilities—think about wraps, dips, or even a delightful pizza base!
The texture and taste of freshly baked pita is unmatched and can be made to suit your preferences with various fillings like chicken ham or turkey bacon. Plus, you can easily freeze any leftovers to enjoy later, maximizing your efforts. For more inspiration on delicious fillings and serving ideas, check out this fantastic roundup of pita recipes. So, roll up your sleeves, enjoy the process, and savor the results of your homemade adventure!
Print
Fresh Homemade Pita Bread: The Best Easy Recipe for Everyone
Learn how to make fresh homemade pita bread with this easy recipe that’s perfect for everyone!
- Total Time: 1 hour 20 minutes
- Yield: 6 pitas 1x
Ingredients
- 2 cups all-purpose flour
- 1 teaspoon salt
- 1 teaspoon sugar
- 1 teaspoon active dry yeast
- 3/4 cup warm water
- 2 tablespoons olive oil
Instructions
- In a bowl, mix flour, salt, sugar, and yeast.
- Add warm water and olive oil, then knead until smooth.
- Let it rise for 1 hour in a warm place.
- Preheat the oven to 475°F (245°C).
- Divide the dough into balls and flatten them into circles.
- Bake on a baking sheet for about 5 minutes until puffed.
- Remove from the oven and let cool before serving.
Notes
- For best results, use a pizza stone if you have one.
- You can add herbs for extra flavor.
- Prep Time: 15 minutes
- Cook Time: 5 minutes
- Category: Bread
- Method: Baking
- Cuisine: Mediterranean
- Diet: Vegetarian
Nutrition
- Serving Size: 1 pita
- Calories: 150
- Sugar: 0g
- Sodium: 200mg
- Fat: 3g
- Saturated Fat: 0.5g
- Unsaturated Fat: 2g
- Trans Fat: 0g
- Carbohydrates: 28g
- Fiber: 1g
- Protein: 4g
- Cholesterol: 0mg
Keywords: Fresh Homemade Pita Bread, easy pita recipe, homemade pita